https://www.voxelfactory.com/blogs/news.atomVoxel Factory - News2024-02-09T10:28:12-05:00Voxel Factoryhttps://www.voxelfactory.com/blogs/news/vancouver-office-closure2024-02-09T10:28:12-05:002024-02-09T10:36:35-05:00Vancouver office closureFrançois Lahey
St Hubert location continues to serve in English and French and Michelle Dallas, former Burnaby store manager, has joined our team here. So to all our west coast customers, Please contact us at 1-877-360-2159 &service@voxelfactory.com
It is with deep regret that we must announce that the Burnaby location is now closed. While our online sales and in-person visits at the St-Hubert location have continued to increase, visits to the Burnaby store have slowed down over the last few years and we realized that it was better to focus on a single warehouse location. Not to worry, we will continue to ship country-wide and we believe that a centralized inventory will help us better serve you in the coming months and years.
Also note that we are now offering on-site repair & maintenance services for businesses with Ultimaker and Formlabs systems in the Vancouver and Burnaby area.
So what now? Is Voxel Factory going to completely close soon? Absolutely not! Different contexts just require different strategies and this is just the first step of a reorganization plan towards a better Voxel Factory 2.0 with the same good service that we always provided, but with better efficiency and a particular focus towards business services.
Our St Hubert location continues to serve in English and French and Michelle Dallas, former Burnaby store manager, has joined our team here. So to all our west coast current and upcoming customers, Please don’t hesitate to contact us at 1-877-360-2159 or email at service@voxelfactory.com
Thank you to all the Vancouver customers for your 5 years of loyalty, as well as to DJ and Angus for their incredible service during our last year! The two of them have served you tirelessly 7 days a week with the utmost professionalism and courtesy.
François Lahey President
]]>
https://www.voxelfactory.com/blogs/news/ultimaker-promotion2022-09-07T10:20:25-04:002022-09-07T12:22:12-04:00FREE Ultimaker 3 Year Service PlanRoxane DesjardinsFor a limited time, get a free 3-year service plan when you purchase Ultimaker hardware. Valid until September 29, 2022. Purchase of a printer and materials is required.
]]>
https://www.voxelfactory.com/blogs/news/the-voxel-factory-team-tried-the-mayku-formbox2022-04-15T17:07:23-04:002022-04-19T09:31:22-04:00We tried the Mayku Formbox with CHOCOLATE !Roxane Desjardins
Now that we have the Mayku Formbox Vacuum Former, the Voxel Factory team wanted to give it a try. 3 simple steps. 1. Pick a template 2. Make a mold 3. Replicate the template
]]>
Now that we have the Mayku Formbox Vacuum Former, the Voxel Factory team wanted to give it a try.
3 simple steps. 1. Pick a template 2. Make a mold 3. Replicate the template
Let’s be honest, we had a lot of ideas for the template, but the team wanted to stick with something simple and practical. So we started with an obvious choice, the Voxel Factory logo.
Okay, now that we know that we want to have the logo, what can we do with it?
We thought about using the logo as a template to create some keychains for all our employees, but after some reflection, we came up with a better idea ! Since Easter is coming, why not make some egg chocolate shells and put a mini Voxel Factory keychain inside of it?
The idea is perfect. Our team always likes to sweeten one’s mouth and a small surprise gift inside of it for each employee while being able to try the Mayku Formbox : how convenient !
We went for it.
STEP 1 - Pick a template
Marc, our graphic designer, made an svg file of the Voxel Factory logo that we will be using for the keychains and sent it to Samuel, one of our technicians who converted it in fusion 360 to make it into an stl. File. After that, our second technician William loaded it in the Ultimaker Cura software to rescaled it and to prepare the print settings. We decided to do the keychain in 2.85mm PLA Blue Filament and keep it that way. For the egg shells that will be our template for the mold, William found a perfect model on thingiverse and also loaded it in the Ultimaker Cura software to rescaled it and print it.
After having the two files ready, William sent it to our Ultimaker 2+ Connect 3d printers via the digital factory cloud to start the magic.
Here is the final result for the Voxel Factory keychain and our egg shell model that we will be using for molding.
STEP 2 - Make a mold
We are ready to make a mold, let’s try this Mayku Formbox !
For our mold, we used the 0.5mm Clear Sheets that came in the starter kit, since they are food-safe.
The mold turned out perfect as expected with our template. Since we only had one print, we used more sheets to recreate other molds to be able to make all the egg shell chocolates at the same time.
STEP 3 - Replicate the template
We replicated our template with the chocolate ! We used meltable chocolate for our eggshells and we had 3 different flavors : Dark chocolate, Milk chocolate and Vanilla flavor for the decoration. Honestly, once the chocolate in the mold cooled and hardened, our eggshells came out of the mold very easily, we didn't even manage to break one while creating them! We were able to replicate the chocolate eggshells as much as we wanted and the molds never warped and/or broke!
We were really surprised at the quality of the molds formed with the Mayku Formbox !
Plus, we had fun doing it. The team was really happy with the results !
Happy Easter everybody !
]]>
https://www.voxelfactory.com/blogs/news/formlabs-3d-printer-owners-this-is-for-you2022-03-15T11:32:53-04:002022-03-22T13:11:21-04:00Formlabs 3D Printer Owners - A special promo for you !Roxane Desjardins
Already own a Formlabs Form 2 3D Printer ? Looking to upgrade it for theForm 3 +,Form 3B +orForm 3L? Now's the time !
$625 discount on Extended Warranty or Pro Service Plan
$200 discount on resin
*All purchases must be made in the same order for the discount to be applied*
Conditions of the offer :
The new purchase must include a service (extended warranty and/or service plan) and minimum one resin cartridge.
The offer is only applicable for a first-time upgrade. If the Form 2 Serial Name was already used for a previous campaign, it is not eligible.
This offer is non-stackable with other campaigns or promotions.
Here's why you should make the step and adopt the Form 3 SLA printer :
- TheLow Force Stereolithography (LFS) technology - an advanced form of stereolithography that leverages a flexible tank and linear illumination to offer a huge leap forward in print quality and printer reliability.
- A lower force print process - Improves surface quality, with less visible layer lines and decreased surface roughness for incredible smooth surface finish and clarity. Faster cleanup and finishing. Better print success across all materials. Some new material released are only compatible with Form 3.
- A Light Processing Unit (LPU) that moves in the X direction. It uses a spatial filter to create a crisp, clean laser spot for greater precision, and a higher-frequency galvanometer, which leads to some gains in print speed over the Form 2.
- Remote print - the Form 3 introduces the ability to start prints from anywhere. Pre-prime the printer before you leave, then start the next print job from anywhere in the world (not just the local network).
- New Features - A larger, higher resolution touchscreen, two LED status indicators with a speaker and a sleek, redesigned hardware.
With the Low Force Stereolithography (LFS) print process behind the Form 3 (and its large format counterpart, the Form 3L), Formlabs has re-engineered the print process to create an in-house fabrication platform that’s more reliable and versatile than ever. It still has a familiar workflow, but with new ways to interact.
]]>
https://www.voxelfactory.com/blogs/news/meet-our-women-happy-international-womens-day2022-03-08T17:07:52-05:002022-03-18T14:27:58-04:00Meet Our Women - Happy International Women's DayRoxane DesjardinsOn this International Women's Day, Voxel Factory would like to thank and congratulate Nadya, Michelle, Roxane and Samantha for their essential work in the company. #BreakTheBias
On this International Women's Day, Voxel Factory would like to thank and congratulate Nadya, Michelle, Roxane and Samantha for their essential work in the company.
These four women make the Voxel Factory Team unstoppable.
Words from François Lahey, co-owner and sales director :
'' Nadya, thanks for being so strong, the number of things that you accomplish in one day will always impress me !
Michelle, you are literally holding the whole business on your shoulders since the beginning of this pandemic. We very much appreciate it.
Samantha, although you work in Vancouver, I always hear good things about you and your work and never had to complain. We are pleased to have you in our team.
Roxane, welcome to the team ! Everyone already knows how lucky we are to have you and your work already gives concrete results, you should be proud ! ''
Happy International Women's Day !
#BreakTheBias
]]>
https://www.voxelfactory.com/blogs/news/t2022-02-28T13:21:30-05:002022-03-18T14:29:27-04:00Technician needed at Burnaby Store - Join the Team !Roxane DesjardinsWe are currently looking for an experienced full time Technician to support our Vancouver / Montreal teams. Come and join the Voxel Factory Team - work with us in our 3D printer store !
We are currently looking for an experienced full time Technician to support our Vancouver / Montreal teams.
Come and join the Voxel Factory Team - work with us in our 3D printer store !
Why work at Voxel Factory?
- A dynamic environment with a fantastic team, rapidly evolving environment
- Open space office to support a collaborative working environment and facilitate communication.
- Accessible team to facilitate questions and help with tasks
Responsibilities
We are looking for a technician who is able to work with the different technologies such as FDM (Filaments), SLA (Liquid resin) and SLS (Powder) and perform maintenance and repairs on 3D printers, like Ultimaker, Formlabs, Sinterit, Sindoh, 3D Platform and Prusa Research.
- In depth technical support in person and via email.
- Pre/post sales technical support via email.
- Actively repair and calibrate 3D printers for clients (Prusa)
- Quote and make print jobs for our clients on our 3D printers
- Give hands on workshops on all 3D printers by Zoom or Skype
- Ability to use slicing tools like Slic3r, Cura, Simplify3D, etc.
- Maintain and repair as required 3D Demo printers at Voxel Factory
- Assist with daily outgoing shipments (Pick/Pack/Ship)
Qualifications
- Collegial, vocational or technical training related to the fields of mechanical assembly, production, installation, electromechanics or any other science profile.
- Must have a valid drivers licence and have access to reliable vehicle (travel may be required to customer locations)
- Must be able to attend manufacture training - and be able to travel freely within North America and Europe
- Must be able to attend customer sites such as schools, government agencies or other industrial locations that require full vaccination status
- Must have at least 1 year - 3D printing experience (repair and operation)
- Capable of lifting heavy loads
- Able to stand for extended periods of time
- Proficient with basic hand tools
- Experience with mechanical assembly tasks
- Experience with wiring, crimping and soldering
- Analytical and problem-solving skills to troubleshoot issues
- Not afraid to get dirty, be confident and organized.
- Must own, and/or have built at least 1x 3D printer (tell us what you have)
- Comfortable with 3D software (OpenSCAD, TinkerCad, Autodesk, solidworks etc.) Expert level not necessary, basic level or higher.
- Speak and write English, ability to speak French is an asset.
- 2 years experience in Assembly (asset)
- Must have a Skilled Trade Certification
Working Conditions
-Adaytime work schedule from Monday to Friday.
-A salary commensurate with your skills and experience.
-Workplace : 3855 Henning Drive, #106, Burnaby, BC V5C 6N3
Add - Technician Vancouver to your email subject line.
]]>
https://www.voxelfactory.com/blogs/news/new-ultimaker-cc-print-core-0-4mm-and-0-6mm2021-07-28T17:22:28-04:002022-02-24T15:13:11-05:00New Ultimaker CC Print core 0.4mm and 0.6mmMichelle DallasThe CC print core design has been updated in July 2021, whereby the CC 0.6 print core will replace the CC red 0.6 print core and a new CC 0.4 print core is introduced.
Hardened Steel Nozzle Supports High-Strength Materials and New 0.4mm Nozzle Allows for Greater Detail and Enhanced Surface Finish
The print core CC 0.6, 0.4 and CC red 0.6 are specially designed to print with composite materials on the Ultimaker S5 and Ultimaker S3
The CC print core design has been updated in July 2021, whereby the CC 0.6 print core will replace the CC red 0.6 print core and a new CC 0.4 print core is introduced. The new design is more efficiently produced and features updated components that are more robust, leading to an increased reliability when using it.
Technical differences between CC cores
The CC Red 0.6 print core and the new CC 0.6 print core have the following differences
Print core CC Red (old design)
Print core CC (new design)
Brass nozzle with ruby tip
Tool steel nozzle with Tin coating
Brass heater block
Aluminum heater block
Steel heat break (0.15 mm thickness)
Titanium heat break (0.3 mm thickness)
Aluminum heat sink with Teflon insert
Aluminum heat sink without Teflon insert
Differences between CC 0.4 and CC 0.6 print cores
Additionally, a CC 0.4 print core is introduced in July 2021. The CC 0.4 print core prints with smaller line widths and by default both with 0.15 and 0.2 mm layer heights. This enables users to print composite applications with higher visual quality and smoother surface finish, while the CC 0.6 print core leads to shorter print times. With large overhang angles, the CC 0.6 print cores could produce better overhang quality.
]]>
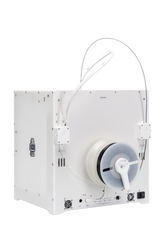
https://www.voxelfactory.com/blogs/news/new-ultimaker-2-connect2020-11-10T09:53:41-05:002022-02-24T15:02:04-05:00New Ultimaker 2+ Connect 3D printerMichelle DallasMore]]>
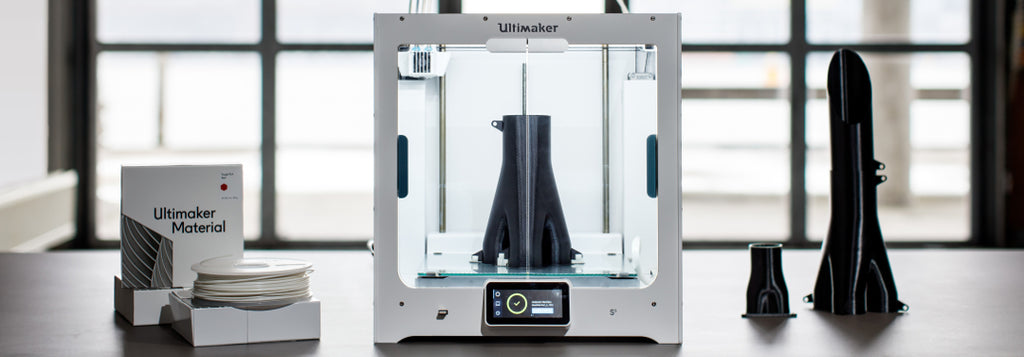
Start 3D printing the
Ultimaker way
With networking capabilities and a new touchscreen, the Ultimaker 2+ Connect is your reliable first step into our world of easy, remote 3D printing. Simply unbox and connect three components, and get started. This speedy setup even makes installing multiple 3D printers effortless.
Ultimaker 2+ Connect - Features and Specs
Build volume: (XYZ) 223 x 220 x 205 mm (8.7 x 8.6 x 8 in)
Print head: Single extrusion with swappable nozzles
Layer resolution:
0.25 mm nozzle: 150 - 60 micron 0.4 mm nozzle: 200 - 20 micron 0.6 mm nozzle: 400 - 20 micron 0.8 mm nozzle: 600 - 20 micron
Assembled dimensions: 342 x 460 x 580 mm (13.5 x 18.1 x 22.8 in
Net weight: 10.3 kg (22.7 lbs)
High uptime. Low maintenance
Thousands of designers and educators love Ultimaker technology because it just keeps working – day and night, year after year. Since 2015, over 6 million prints have been prepared for its predecessor. And the Ultimaker 2+ Connect improves on that workhorse legacy.
A reliable first step into a world of easy, remote 3D printing
Network connectivity: Via Wi-Fi or Ethernet, print remotely over the cloud with added security
Easy setup : Install the printer in minutes, and benefit from improved ergonomics and assisted bed leveling
Next-gen components : A stiffer build platform and rigorously tested material profiles ensure reliable printing
Touchscreen : For every action, the 2.4” color touchscreen gives you intuitive control and assistance
Easy maintenance : A clean and updated design keeps maintenance needs to around 20 minutes per month
Wide material choice : With our open filament system, you can always find the right material
Enhanced safety : The Ultimaker 2+ Connect Air Manager removes up to 95% of ultrafine particles and shields users from hot components (sold separately)
The optional Ultimaker 2+ Connect Air Manager gives you more confidence and setup flexibility. Designed to simply and effectively increase user safety, it removes up to 95% of ultrafine particles (UFPs) and shields users from hot and moving components.
Features : • Filter technology : EPA E10 filter • Fan technology : low-noise brushless fan • Air refresh rate : 1 - 50 m³/h (35 m³/h nominal rate for most materials at 23°C) • Filter replacement recommended every 1500 print hours (approx. 1 year) • Operating sound : less than 51 dBA (including Ultimaker 2+ Connect) • Controlled extraction of air • Enhanced safety : physical barrier against dust and wandering hands • Detects material being used and adjusts airflow accordingly • Easy to install, detected by the printer when connected • Smart monitoring : tracks usage and prompts filter replacement • Optimized for Ultimaker materials, 3rd party materials also supported
]]>
https://www.voxelfactory.com/blogs/news/stores-reopening-in-montreal-and-vancouver2020-07-16T17:35:00-04:002022-03-18T14:31:08-04:00Stores reopening with new products to offerAdrien Yergeau
During the last few months we have been safely working hard behind the scenes and now we have some big announcements to make. Longer business hours, an expanded range of 3D printing filaments, and more!
During the last few months we have been safely working hard behind the scenes and now we have some big announcements to make.
Voxel Factory Montréal and Vancouver are now officially both open for in-store purchases. We have added contactless payment options and have new in-store protocols to keep everyone safe.
We have extended our hours of operation to 9:00 to 17:30 on weekdays. Our Montréal location will also be open 9:00 to 17:00 on weekends. Come in to see our team and check out what we have in store for you.
We have recently expanded our offerings with new product lines. You asked us for more 1.75mm filament types, and we listened! Now we are excited to offer a wider range of choices with the Polymaker filament, including PETG, nylon, polycarbonate, TPU, and much more.
Perhaps the most exciting of these new products are the carbon fibre and glass fibre filled Polymide filaments, available in 1.75mm and 2.85mm. Not sure what the best fit is for your needs? Ask us and we’ll find out together what filament should work best for your application.
We have recently brought on board AquaSys 120 soluble support filament, that works with a wide range of engineering materials, available in 1.75mm and 2.85mm. Currently stocked in Montréal only, but ships Canada-wide!
Stay tuned for Magigoo products coming soon!
We are looking forward to seeing you and assisting you with your 3D printing needs.
]]>
https://www.voxelfactory.com/blogs/news/covid-19-measures-and-impacts2020-07-16T17:33:00-04:002022-03-18T14:31:44-04:00COVID-19 : how it affects us and the measures we now haveAdrien Yergeau
Voxel Factory is taking several measures to limit the spread of the COVID-19, while protecting our employees and customers. We strive to maintain the best service possible for our customers in this time of crisis.
As of July 16, here is the status of our operations :
In-store pickup now available for orders placed online.
Physical stores are open. In-store purchases allowed (contactless payment preferred).
Online orders and shipping continue.
Purchase orders are accepted and processed as usual.
Prices can vary quickly due to the fluctuations of the Canadian dollar.
We answer all emails at the best of our capacity; expect some delays.
We've taken several measures to limit the spread of the COVID-19 virus while protecting our employees, customers and partners. We are doing our best to maintain the excellent service our customers are accustomed to. We wish everyone to stay safe during this time of uncertainty.
We are receiving a big number of questions regarding products from Prusa. We decided to update you on the news we have with a permanent FAQ blog post. We will keep you up to date as we receive new information from Prusa.
Is Voxel Factory selling the Prusa MK3S?
Yes, all Prusa i3 printers kits sold in both Montreal and Vancouver will be MK3S.
Can I upgrade to MK3S if I bought my printer through Voxel Factory?
If you bought a MK3 between January 28, 2019 and February 8, 2019 at Voxel Factory → We sent you your upgrade kit and a tracking number.
If you bought before January 28 → We should receive batches for the upgrades. The quantity and ETA are unknown.
Will I have access to the textured bed vouchers if I bought my MK3 at Voxel Factory during the “eligible for a voucher date”?
We sent an email to every client that purchased a Prusa i3 MK3 printer between September 2017 and February 2018 with all the information needed to claim their discounted textured beds. Offer is valid until September 6, 2019. September 30, 2019.
If you bought a Prusa i3 MK3 during those dates and did not receive an email from us, please write us an email with the subject line : Textured bed voucher. Also, check your SPAM folder just in case.
We are now selling the textured beds at regular price on our website and in our stores.
We want to. We are poking Prusa every month to hook us up.
]]>
https://www.voxelfactory.com/blogs/news/3dlac-adhesive-for-3d-printing-put-to-the-test-with-pla2018-11-19T22:45:00-05:002022-03-18T14:34:39-04:003DLac - adhesive for 3D printing put to the test with PLANathan OrfinMore]]>
What is 3DLac?
3DLac is an adhesive that you spray on your 3D printing surface to help the printed part stick to the bed and prevent warping. It works well with PLA, ABS, flexible filaments and more.
But how well does it work and is it useful?
We put 3DLac to the test with PLA from Materio3D to see exactly how strong the spray is.
In the future, we will experiment with 3DLac with other materials and compare with different adhesion methods.
Testing Method
I wanted to make a simple test that does not take too much time to print, but will also warp. I created a long rectangular block so there would be a decent amount of natural warping. The block is 19.2 cm x 2.6 cm x 1 cm.
All parts were printed on our Ultimaker 3 extended and sliced with Cura 3.3.1. I made three iterations while only changing the bed temperature.
Quick note : Ultimaker 3 extended has a glass print bed.
Print settings:
220°C nozzle, 100% infill, 70 mm/s printing speed and 0.2 mm layer height.
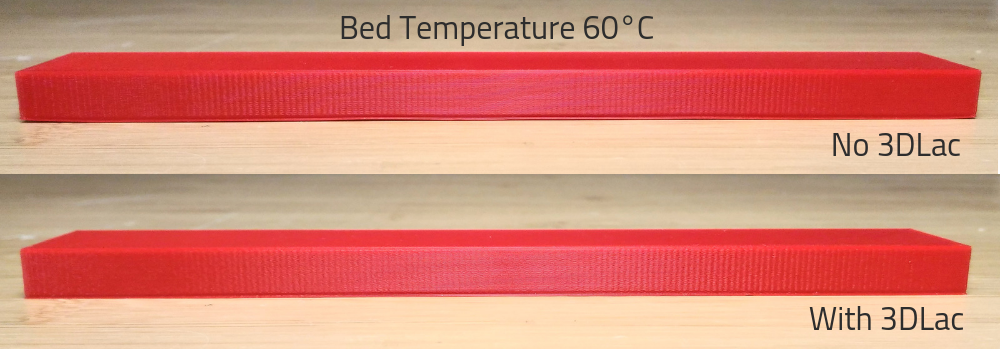
Test 1 - Bed Temperature: 60°C
Picture on top is without 3DLac and the picture below is with the spray.
The difference is barely visible with this print, but there is minimal warping for the stick printed with no 3DLac, whereas the one with the adhesion spray is perfect.
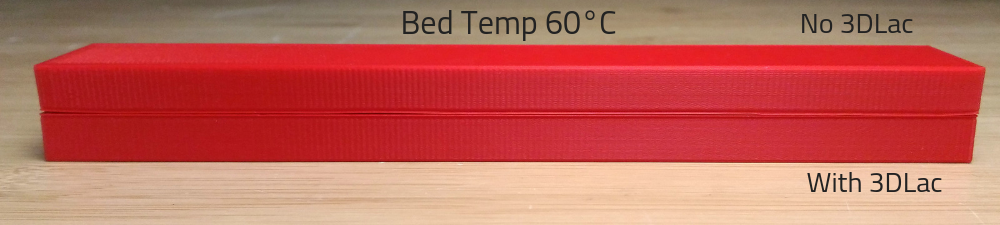
I put both prints next to each other to show you the difference between them. You can see the small amount of warping on the corners of the print on top which was printed without 3DLac.
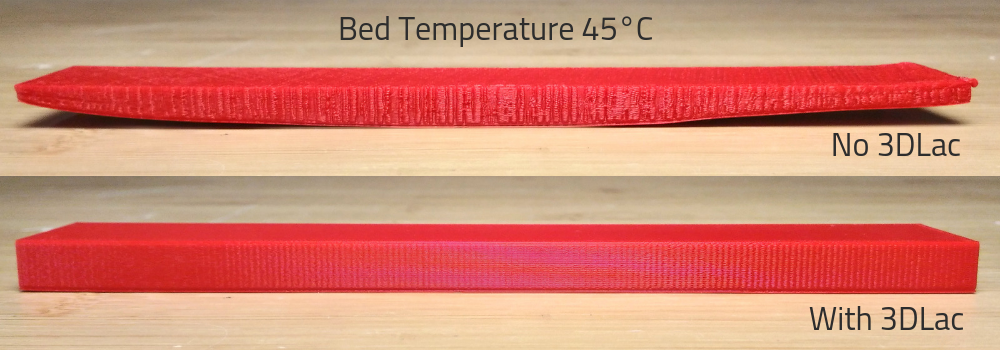
Test 2 - Bed Temperature: 45°C
All other slicing settings remained the same from one print to the next, I only change the bed temperature.
Picture on top is without 3DLac and the one below is with.
I stopped the print with no 3DLac as it was becoming too ugly. On the other hand, the stick with 3DLac printed perfectly. I did not do a comparison for this print as the difference is obvious.
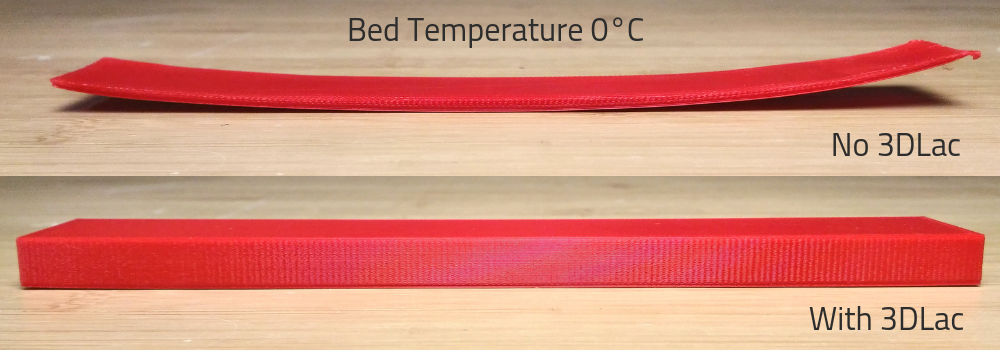
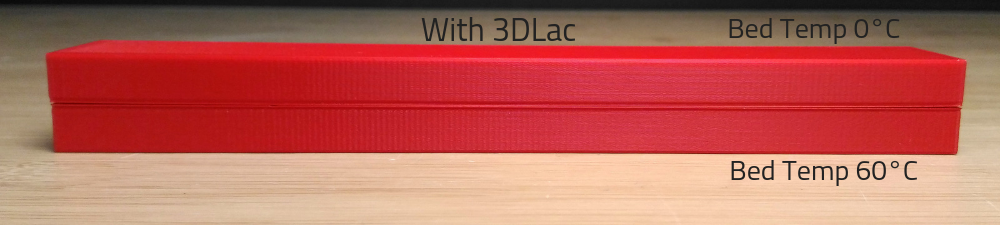
Test 3 - Bed Temperature: 0°C
It might be an excessive test, but I wanted to push the test to the max with the printing bed at 0°C. In our store, the ambiance temperature is around 25°C.
Picture on top is without 3DLac and the picture below is with.
Printing without a heated bed and no adhesive caused a failed print, something that I expected. However, I did not expect a close to perfect print using 3DLac and an unheated bed. There is a minimal amount of warping.
I compared the print with the bed at 60°C with 3DLac against the one printed at 0°C with 3DLac. You can see that the corners of bottom part, the one printed at 0°C, warped slightly.
The Verdict
3DLac is a strong adhesive spray that work very well with PLA.
One can of adhesive will allow you to successfully print many projects. Also, 3DLac upgraded their formula so you can expect your can to last long.
]]>
https://www.voxelfactory.com/blogs/news/5-important-changes-and-enhancements-in-cura-3-5-update2018-10-25T14:23:00-04:002018-10-30T14:54:10-04:005 Important Changes And Enhancements In Cura 3.5 UpdateNathan OrfinMore]]>
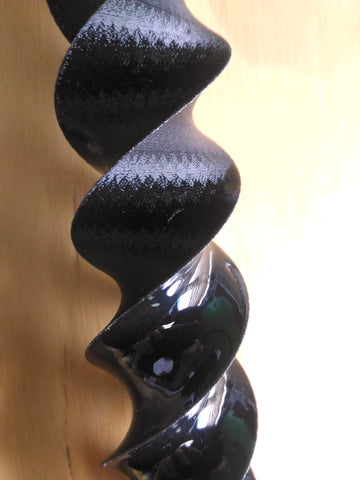
1- Improved overhang wall processing
An improvement in the slicing will give us prints with better overhangs. Cura 3.5 will detect overhang walls and print them with different speeds to have smoother finish. The software will also not start printing perimeters on an overhanging wall. (Contributed by smartavionics)
Both pieces were printed using recommend settings for Ultimaker 3 extended, no other settings were tweaked apart from : 220 Celsius temperature, 0.2 mm layers, 20% infill, with skirt.
Print time for Cura 3.3.1 was 2h51 and 34 gr. For Cura 3.5 it was 2h47 and 33 gr.
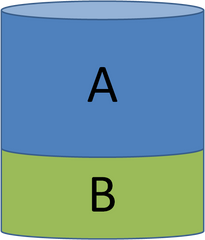
Cura 3.5 generates prime towers in a different way. Instead of printing layers of different material on top of each other, it will now print one tower inside the other. A little bit like Russian dolls. Each material is printed on top of the same material which resolves the bonding issues between certain materials. Prime towers will now be stronger and more reliable than before.
(Old prime tower slicing on the left and Cura 3.5 slicing on the right)
3- Better infills
Support infill line direction. You can now rotate the direction of the infill line patterns to create stronger supports and reduce artifacts on the final print. (Contributed by fieldOfView)
Extra infill wall line count. Add more walls around the infill to better support top and bottom layers and reduce sagging of those layers. You can have less top and bottom layers for the same quality. Although, this will use a little bit more material. (Contributed by BagelOrb)
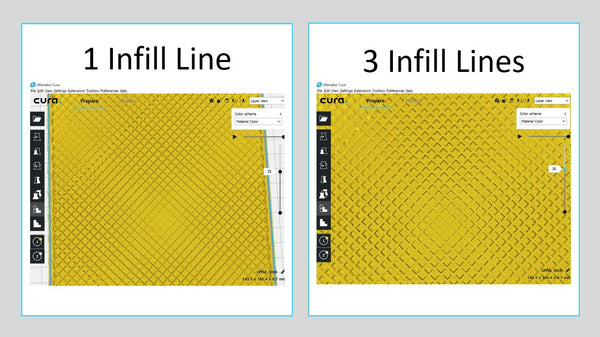
Multiply infill. Have stronger infill by multiplying infill lines on the same pattern. (Contributed by BagelOrb)
Removed unnecessary travels by almost always connecting the infills lines that should’ve been connected from the start. (Bug fix)
4- Custom support plugin
Similar to the support blocker, you can now add custom support blocks on your models with a simple click. Install the plugin by going to the Toolbox → Browse Packages → Custom support → Install and then restart Cura. (Contributed by Lokster)
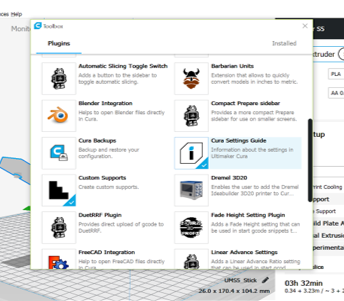
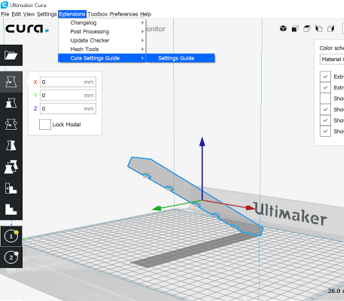
5- Cura settings guide
Have you ever wondered about what a particular setting does? An index plugin will explain settings with text, images and videos for certain settings.
Install the plugin by going to the Toolbox → Browse Packages → Cura Settings Guide → Install and then restart Cura. You will be able to find the Guide under the Extensions tab → Cura Settings Guide → Settings Guide.
]]>
https://www.voxelfactory.com/blogs/news/how-to-post-process-your-3d-prints-in-less-than-15-minutes-with-xtc-3d2018-09-06T14:38:00-04:002022-03-18T14:35:17-04:00How to post-process your 3D prints in 15 minutes with XTC-3DNathan OrfinMore]]>
Problem
You finished a long 3D print and the result is not exactly what you wanted. Your printer is not perfectly calibrated, there are a lot of vibration lines and it bothers you.
Or, the filament colour is a bit off for the project you had in mind.
In either case, you don't want to waste more filament to get the same result or worse.
You decide that you want to post-process your part. But, you don’t have all the time in the world, nor all the money to spend on fixing an imperfect print. You are looking for a fast, easy and cheap way of post-processing your part to perfection.
Solution
We have a quick fix for you and it comes in the form of XTC-3D. A simple and effective way to make the layers disappear or at least, a lot less visible than before.
It is simple, as you only need to mix 2 liquids together and apply it on the part.
XTC-3D is something like epoxy coating for many material types, whether it be from FDM, SLA or SLS printers. At Voxel Factory, we covered parts made from PLA, Formlabs Standard Resin, Carbon Fiber, Woodfill, Bronzefill, Bamboofill and Glowfill.
What's in the Box
Bottle A, Bottle B, wooden stick, brush, cup and instructions.
How-to use XTC-3D
Step 0: Read the instructions
Obvious.
Step 1: Intensely shake Bottle B
Bottle B contains a hardener liquid and thus needs to be properly shaken before mixing.
Step 2: Pour Bottle A and Bottle B in the measuring cup at a ratio of 2:1
There needs to be twice as much of liquid A than liquid B.
At first, you might not know how much liquid you need. 1 oz of the mixture can cover up to 100 square inches. Unless you have a huge part, 1 oz should be good enough to start. If ever you need more, make more.
Step 3: Mix vigorously for 1 minute
Take the wooden stick and mix it up. Make sure to scrape the bottom and the sides of the cup.
Important side note: mixed XTC-3D is exothermic. While mixing, heat will be generated . Make sure not to mix large quantities in plastic containers as it might melt it. Also make sure not to make skin contact or be close to combustible materials while hot.
Step 4: Apply the coating on the printed part
If the part is small, using the plastic cup should give more than enough time to get your coating done.
If you worry that the mixture will dry up before coating your piece, you can pour the mixture on a flat surface. This will spread the concentrated mass and increase your working time. Smooth-On recommends making a platter from aluminum foil and pour the mixed XTC-3D in it.
Use a disposable brush that you do not care too much about since it will be unusable afterwards. Paint over the piece by spreading the mixture printed part.
Step 5: Let it cure
You can let it cure (“dry”) at room temperature for 2 hours (73°F/23°C). Or, you can cure it faster by putting the piece in mild heat (150° F/60° C) for 15 minutes. Once cured, your part will have a smooth glossy finish.
Optional steps
You can sand and/or paint the coating for different types of finishes.
Sand the part with 220 sand paper for a matte finish and to get rid of small imperfections or excess coating. Make sure not to breathe in the dust while sanding. Wearing a mask is not a bad idea. Once sanded, it will also be easier to paint the piece.
You can first put a primer or go ahead and paint the piece with acrylic enamel paints.
XTC-3D is a simple solution (pun intended) to post-process 3D printed parts to have a glossy or matte finish.
Here are some parts that we covered with XTC-3D
]]>
https://www.voxelfactory.com/blogs/news/ultimaker-s5-3d-printing-fdm-solution2018-04-23T05:49:00-04:002022-03-18T14:34:17-04:00Ultimaker S5 3D Printer - Ultimate FDM SolutionNathan OrfinMore]]>
The Ultimate FDM 3D Printing Solution
Discover the easy-to-use desktop 3D printer with a large build volume that delivers accurate, industrial-grade parts, time and again. With simple setup, high uptime, and reliable dual extrusion, Ultimaker S5 is the complete professional 3D printing solution.
In this blog post we will cover the following topics :
Exceed your limitations by thinking big and printing bigger than before with a build volume of 330 x 240 x 300 mm available to create your perfect prints. Combined with Ultimaker’s reliable dual extrusion and water-soluble support, the S5 gives you even more freedom to realize your designs or print multiple parts in one go so you can meet demand with maximum efficiency, while fitting comfortably on your desk.
Reliable Adhesion, From First Layer to Finished Part
A perfect first layer is crucial to every 3D print. Even more so with big prints. To ensure that this happens every time, Ultimaker have overhauled their active levelling technology. The Ultimaker S5 probes the build plate in a greater number of locations, creating a precisely detailed height map of the build surface. Using this data, it compensates for any surface deviations in real time, giving you a perfect, ultra-flat first layer, with secure adhesion that lasts the entire print. There’s no need for constant monitoring - just start a print and leave the Ultimaker S5 to do its job, while you do yours.
The Ultimaker S5 packs powerful technology in a simple, clean, stylish enclosure that fits right in with your office. An enclosed front, with tinted glass doors, ensures that the internal temperature and airflow are optimal. An intuitive touch screen interface guides you through operation of the printer and displays detailed status information. Frame lights provide visual feedback, and project clean white light to overview and inspect your print up close. And an embedded power supply gives the printer a clean footprint, making it ideal for shelf or rack mounting.
More Features for Better Prototyping
A Bowden extrusion system keeps the print head ultra-light, for the fastest possible performance. A tight filament path ensures a reliable experience printing with flexible materials, such as TPU 95A.
Loading, unloading and changing material is effortless, with an ergonomic locking lever built into each feeder. Flip the lever upwards to manually insert or remove material. Flip it closed, and constant force is applied to the material, so it is driven accurately to make sure you can finish your big prints with ease.
Material is moved at a precise rate with a tool steel feeder gear, with an extra-hard coating to prevent long-term wear. And the redesigned silicone nozzle cover keeps print head airflow consistent, for efficient material throughput.
A built-in filament flow sensor intelligently detects when material stops moving or is nearing an end. To save your print if a spool runs out, the Ultimaker S5 will automatically pause and prompt you to take action.
Material – Tough PLA Plus All the Ultimaker Collection
3D print everything from quick prototypes to complex, technical parts with Ultimaker’s range of build and support materials. And with an open filament system, you can also choose a custom material solution.
The Ultimaker S5 supports the full portfolio of Ultimaker materials, including ABS, CPE+, Nylon, and TPU 95A. A 750 g spool of the newest material, Tough PLA, is included in the box of each Ultimaker S5.
Ultimaker Tough PLA - A technical PLA filament optimized for printing technical models at larger sizes such as functional prototyping, tooling and manufacturing aids, with no delamination or warping.
With an impact strength similar and higher stiffness compared to Ultimaker ABS, Tough PLA is less brittle than regular PLA and gives a more matte surface finish quality. This material will the standard shipped with the S5 (in the box). This material is available in four colours : Black, White, Red and Green.
A smart spool holder conveniently clips on to the back panel of the Ultimaker S5 and accommodates two separate 750 g material spools. Load a spool onto the holder, and using the holder’s built-in NFC reader, the printer will recognize the Ultimaker material type and automatically select the optimum printer settings, so you don’t need to.
Cura Connect on the Ultimaker App – Available on iOS and Android, the Ultimaker App allows you to connect with your Ultimaker 3D printer wherever you are, whenever you want.
Now, a mobile version of the popular Cura Connect notifies you when their print job is ready and when a printer needs special attention or maintenance. It also gives you insights on any queued print jobs and allows you to monitor progress via the camera to keep on eye on your big prints. You can send a job to the 3D printer without constant monitoring and focus on creating your next innovative 3D designs.
The Ultimaker app is available on Google Play and the App Store for devices with iOS and Android 5.0 and up.
With high-speed Wi-Fi and LAN connectivity built directly into the Ultimaker S5, regular firmware updates, with new features and improvements, will enhance the printer’s capabilities over time.
Why Buy Your Ultimaker S5 in Canada at Voxel Factory?
The Voxel Factory Advantage – One stop shop for your FDM needs
With every purchase of an Ultimaker 3D printer, we offer a free 3-hour hands-on training to 2 people (value of $300) to show you how to use the printer to accomplish your 3D design goals. We also train you to use Cura software and we share tips acquired through years of experience so that you can be miles ahead of your competition by avoiding common and technical 3D printing mistakes when printing large designs.
Moreover, our certified technicians are fully capable of repairing and providing maintenance in case of complications to make sure you get back to streamlining your production as fast as possible without excessive downtime.
At Voxel Factory, we keep all spare parts needed for maintenance & repair as well as every filament available from Ultimaker with frequent stock replenishment to make sure you have everything you need quickly when printing big.
]]>
https://www.voxelfactory.com/blogs/news/formlabs-complete-sla-printing-solution2018-03-08T15:31:00-05:002018-06-13T10:54:28-04:00Formlabs Complete SLA Printing SolutionNathan OrfinMore]]>
Complete SLA Solution Available at Voxel Factory
With the release of Formlabs Wash & Cure machines and our Partner SupportCertification, we can now offer a complete solution package to fulfill SLA 3D printing needs of enterprises, small business and individuals in Canada.
Stereolithography (SLA) printing works by photopolymerization, or in simple English: a laser that solidifies liquid resin (polymers) by beaming its light in a very precise manner. This process allows a hyper smooth finish. Since the light of the laser is doing most of the work, the printer is not vibrating. Therefore, each print has no visible deformation due to vibrations and it is near impossible to distinguish between layers.
Ease of Use
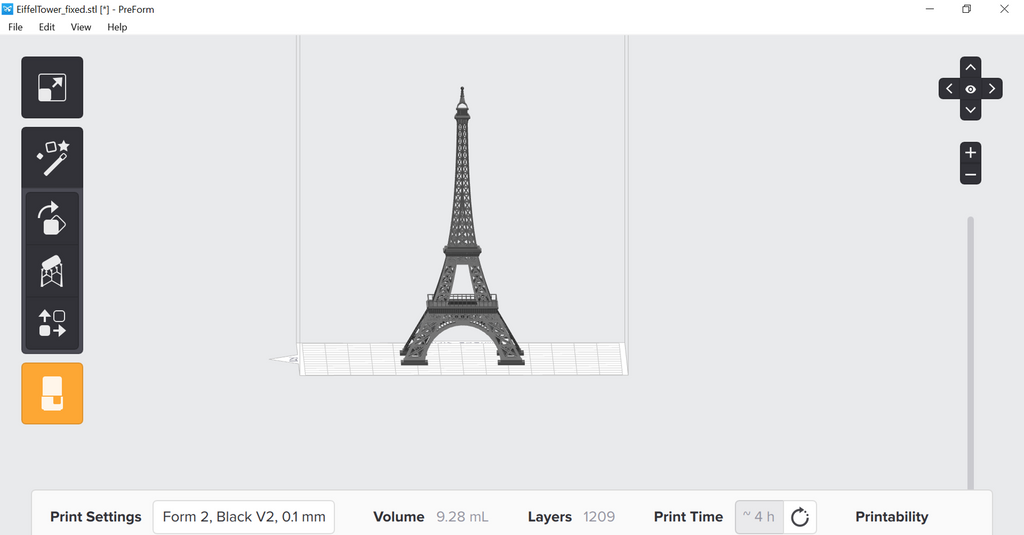
All you need to do is insert file (.stl, .obj, etc.) in PreForm, click the magic button if you don’t know what to do. You can also play around if the settings if you so desire. Then export (Wifi or USB), insert file in printer, insert resin cartridge, insert resin tank (especially when changing resin), open the air inlet and press print. Final step: Enjoy & wait.
Moreover, the PreForm and Form 2 are constantly being bettered via software and firmware updates. Formlabs have an entire team working full time on innovating the PreForm software.
Reliable/Professional
Formlabs has worked extensively on making sure that their printers are the most reliable on the market. As explained to us by Kevin Gautier when we visited Formlabs HQ in Boston during a Partner Summit, the Form 2 has multiple sensors and mechanisms to give the printer maximum reliability ranging from heat sensors, resin wiping to remove particles from the build plate and lateral movement when changing layers to reduce suction between the print and the resin tank.
All of this (and more) makes the Form 2 an immensely reliable and professional desktop SLA 3D printer for a large variety of uses.
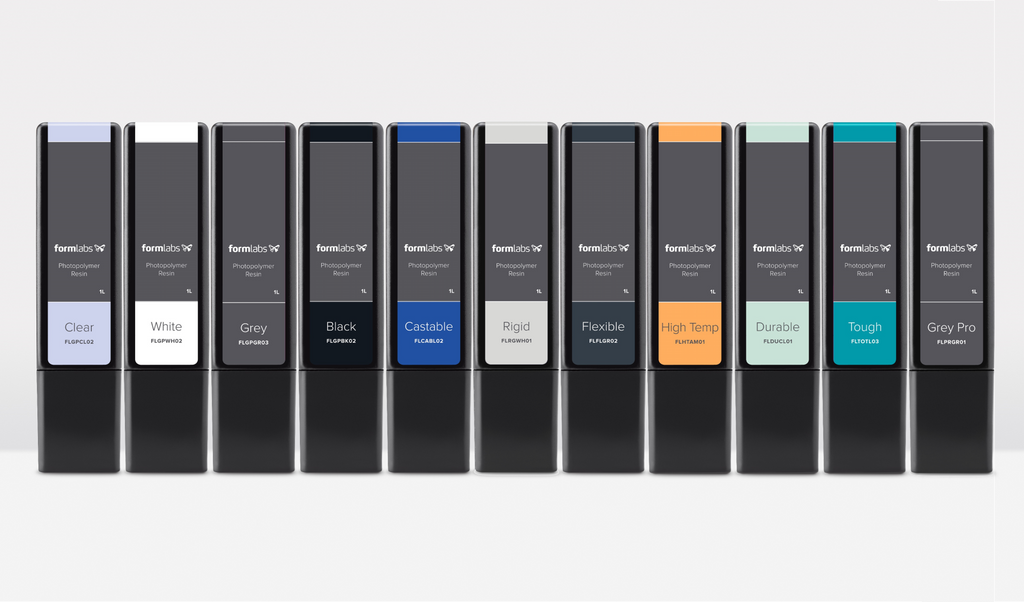
Large variety of materials are available for multiple use. The printer automatically recognizes the inserted cartridge and refills the resin tank so you don't need to get your hands dirty.
Engineering Series
Every engineering resins attain maximum mechanical and functional proprieties after post-curing.
Tough: Great resin for making robust parts that will receive some stress and strain for short amount of time. Useful for jigs, fixtures and drill guides.
Durable: Very high impact strength, perfect for parts needing low friction and resistance to wearing. Making multiple gears with this resin is a great idea as the material will glide against itself instead of generating friction.
Rigid: Strong, stiff and creep resistant with low elongation due to being reinforced with glass. Thin walls and fan blades are an incredible application of this polymer. Use only with LT resin tank*.
Grey Pro: This versatile material is made for more rigorous and functional applications than the standard resins (not to be confused with Standard Grey). Also has low creep (deformation over time) making the printed parts good for supporting other objects. Use only with LT resin tank*.
Flexible: Ideal for parts that need some flexible movement. Soft to the touch makes the resin a great choice for comfort design part (grips, handles, etc.).
High Temp: You need not be a detective to figure out that this resin is made for parts that need to resist high temperature. Heat Deflection Temperature (HDT) of 289 C, the highest on the 3D printing material market. Also useful for injection moulding (around 100 shots with modification) and thermoforming. Once printed, the internal channels of the part are easier to clean compared to other resins.
*Note: Grey Pro and Rigidneed to use Long Term (LT) Resin Tanks, which we also offer. It is required as the polymer used in those two resins are not compatible with the material used to make the standard resin tank.
Standard Use/Prototyping
Grayscale - Black, White, Grey: End result gives a finely detailed print with a smooth surface and matte finish. Can be painted over afterwards. It is not necessary to post-cure, but doing so will make the part stronger, more stable and easier to sand and paint.
Clear: Printed parts are translucent, which makes a cool idea to use LED lights in the final design. Also not necessary to post-cure this resin, but doing so will make the part stronger and more stable.
Color Kit:Make your own color resin with this kit. Comes with a recipe book that contains 16 colors or you create your own withthis color picker. Color-Coded Jigs would be a good use for this resin beyond artistic reasons.
Special Uses
Castable: Designed for casting hyper precise parts with smooth finish like rings and other jewelry at a cost-effective price. This material burns out without ash or residue.
After printing with liquid resin, you need to clean up the printed parts from excess liquid. One of the ways to clean the parts is to use the finish kit, it requires to put on gloves and lots of manual work. The other way is to use the Form Wash for easy, automated and reliable cleaning.
How it works:
Pour 8L of IPA in the Form Wash (Just to avoid confusion, by IPA we mean Isopropyl Alcohol, not India Pale Ale)
Once the print is finished, you can either put the build plate directly in the Form wash or take the part off the build plate and put the printed part in the washing cage.
Set the timer and press start.
The Form Wash will then wash the print(s) by moving the alcohol around the pieces and it rinses off the liquid resin from the prints. For optimal results, use fresh IPA.
Post-Wash & IPA
Now, how can we know if the IPA that has been used is still okay to use? Formlabs created a hydrometer to show the percentage (%) of resin in the IPA, which you must first calibrate with a fresh batch of IPA.
Once the washing is finished, the Form wash opens its door and lifts the printed parts out of the IPA which you can take out, let them dry and post-cure them in the Form Cure.
Form Cell Compatibility
The Form Wash is also Form Cell compatible, meaning you can own a medium scale automated SLA 3D printing process that schedules prints and washes with minimum effort and almost no human involvement.
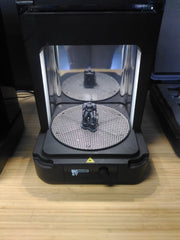
As mentioned in the materials section, most materials need curing to attain maximal proprieties, especially the engineering materials.
What is the Form Cure and what does it do?
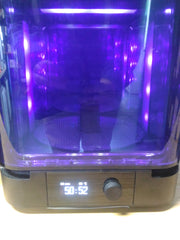
Form Cure is the machine created by Formlabs to complete its 360 solution to SLA 3D printing. As explained to us by the engineers who created both the Wash and Cure, there needs to be both UV lights and heat to cure the parts to max proprieties.
As might be expected, some materials need more time or more heat than others to be at their full potential. For an extensive list click here.
How to Use It
As you may have noticed, Formlabs has a special obsession with wanting to make things as simple as possible while blowing your mind and it’s no wonder that the Form Cure follows in the same pathway. Using the Cure is easy: you put the part(s) in the machine, close the door, select your setting and press start.
The holed support plate will then rotate to allow dispersion of the heat and 12 UV lights to reach every part of the printed pieces over the preselected amount of time. The UV lights with the back mirror look like something out of this world that hypnotize you which makes the time go by much faster. Like we said, complete solution.
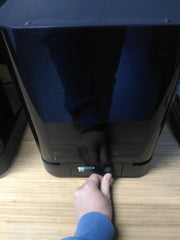
Voxel Factory Tip/Precision
One thing to note, if you decide to leave support on the prints while curing, there might be deformation during the curing process due to heat, depending on the material use and the complexity of the print. We had a case like that with the Durable resin where the supports deformed. This can be explained by the low heat resistance of the Durable resin and the insufficient amount of support in the print. We asked the materials experts when we visited them and they advised us to, first, if possible to take off supports and, second, to reduce the heat by a few degrees if the supports are really needed to hold the piece together. Another option is to add more support to support the piece from gravitational deformation.
Form Cell Compatibility
Side note, the Form Cure is not compatible with the Form Cell (or at least not yet). The reason is simple, the automated arm of the Form Cell grabs the build plate from the Form 2 and transfers it to the Form Wash, it could technically transfer the build plate into the Form Cure.
However, the bottom of the part would not be cured, and the build plate would be rendered useless afterwards since the resin particles would be cured on the plate making it impossible to reuse.
At Voxel Factory, with every purchase of a Form 2, we offer a free 3 hours hands-on workshop to explain everything you need to know to operate your printed at maximum efficiency. We look both at hardware and software.
Certified Service
Outside of Formlabs, Voxel Factory and our very own William Puchot is the first certified person in North America allowed to operate, maintain and provide technical support for Formlabs machines.
This assures that your machines will be well taken care of especially in difficult times where professional reliable help is needed.
Formlabs Warranty
The Form 2 comes with a standard 1-year manufacturer's warranty that can be expanded for an extra year.
Warranty includes repairing, replacing or exchanging parts at no extra cost for neither the physical parts nor the labour.
]]>
https://www.voxelfactory.com/blogs/news/andre-theberges-mk3-buiding-experience2018-03-08T14:42:00-05:002018-03-12T11:10:13-04:00André Théberge's MK3 Building ExperienceNathan OrfinMore]]>
We received a text from a client describing his experience building anOriginal Prusa i3 MK3 DIY kitbought from Voxel Factory, a one-stop shop in Canada for all things 3D printing.
My experience building the Original Prusa i3 MK3 kit
I was one of the first to receive the second batch of i3 MK3 printers from Voxel Factory and wrote this short memo to give my impressions of the kit and to help first-time builders with a few tips.
The kit comes in a box, and the parts are sorted into bags, labelled accordingly to the chapter requiring those parts. The 3D printed parts come in separate bags. There is a spare part bag (#9), along with some maintenance supplies included (an acupuncture needle, a stick of glue) and an SD cards with some test files. Also, there are 2 black nylon wires, they are not bits of filament, as I previously thought, they are strain relievers and quite important, please do not throw them away.
Some basic tools are included, and you can build the whole printer with those. However, I recommend a few more tools to make your life easier, namely a pair of cutters (for the filament and zip ties), a set of metric hex screwdrivers (2.5 mm, 2.0 mm and 1.5 mm), seewww.miponline.comfor a fantastic set, and a Vernier to square the frame.
The assembly instructions are very clear, with lots of illustrations. Check the colour coded dots, which matched the illustration. This is especially important for Chapter 8, when you connect the electronics, and with the wire management.
Open one bag at a time and check that all the parts are there before building. Some of the smaller translucid parts in the extruder (washers, PTFE tube) may get stuck in the #5 bag, and you may think you are missing a part. It happened to me. Overall, there were no missing parts and even some extra screws, beside those in bag #9.
There were no errors in the manual, but sometimes, you have to refer to the picture to get the ‘right’ explanation, as some of the language in the text could lead to confusion. In doubt, follow the picture.
The 3D printed parts are of good quality, and do not need to be ‘reworked’, holes are the right size… Sometimes, they are tight, especially the holes where the nylon strain relief belongs.
The hardest part to build is the extruder, followed by the wiring (cable management). Take your time, as it could be frustrating sometimes. Reread the instruction carefully for the wire management sections in chapters 5,7 and 8, and follow them religiously, if not, there might be some wire or zip tie sticking out, which will cause a failure in the Selftest. It happened to me. The zip-tie holding the extruder wires was sticking outside by 3 mm, and the wire for the Noctua fan was also in the way of the X motion, which caused a fail.
The E3D hot-end (chapter 5, page 18) should be pushed all the way in, and when the extruder assembly is finished, the hot end (aluminum block with red wires sticking out) should be almost flush with the orange part. My first try, it was sticking out by about 7 mm, and caused a failure in the XYZ calibration.
A trick to install the power supply cables and heatbed cables in Chapter 8: Remove temporarily the RAMBo cover base from the plate. The screws are easier to access this way.
It took me about 6 hours to build the printer. I would suggest doing it 2 hours at a time, as you get tired, it becomes easier to skip a step and you spend time troubleshooting the error later. It took me two extra hours to calibrate the printer, because I skipped a few steps in the building phase (as described before) and I had to disassemble the extruder twice, and the wire management to fix my mistakes. Just for the record, I am not a newbie at this, having built 3 other 3D printers before. I think for an inexperienced builder, it should take about 8-10 hours to build. Realistically, I do not think you can build it in less than 4 hours, even if you know all the steps by heart.
After you checked everything, especially the electronics!!! Plug it in and turn it on. You will be greeted by a wizard on the LCD screen. Follow the instructions, run the Selftest, then the XYZ calibration (it takes 12 minutes, and it does countless back-and-forth motions on all 3 axis). Insert a filament, run the first layer calibration. The filament will come out round and won’t stick very well to the bed. Using the rotary knob, put a negative offset until you get adherence and a semi-flat filament. The zig-zag pattern corners should come sharp. The square should come out in one piece, but not too squished.
I ran a couple of examples included on the SD card. The Prusa logo at 200 um came out well, better than other printers that I have seen in action. Then, I tried the Treefrog at 50 um (4 hours to print) and at 150 um (1.5 hours to print). Both came out real nice.
Overall, I am quite impressed with the quality and design. All the parts in the printer were actually printed by Prusa Research using similar printers and PETG filament, so it gives you an idea of the possibilities and quality you can expect. The printer is quiet, and relatively fast. I did not check yet the extra features (Power Panic, running out of filament…), but I am sure they will work as described. As for reliability, time will tell. The parts that could break are relatively easy to access, by removing a few screws. My only worry is to take apart the wire management bundles, which will take time to re-assemble. But for the price, I am quite happy with my Prusa printer and the service level from Voxel Factory.
]]>
If you purchased a Prusa i3 MK2/S 3D printer from Voxel Factory, you are eligible to a discount on the purchase of the MK2.5 upgrade kit from Prusa Research. Vouchers are currently being sent; if you plan on purchasing the MK2.5 upgrade kit and haven't received your voucher yet, send us an email! Note that the orders for the MK2.5 upgrade kit are placed on the Prusa Resarch web store and will be fulfilled by Prusa Research directly.]]>
https://www.voxelfactory.com/blogs/news/ultimaker-2-product-spotlight2017-09-01T11:35:00-04:002018-02-22T17:17:03-05:00Ultimaker 2+ Product SpotlightNathan OrfinMore]]>
Ultimaker 2+ Product Spotlight
Summary:
Great printer for testing lots of materials
Optimized airflow for increased reliability
Innovative geared feeder for consistent quality
Easily swappable nozzles
Our thoughts
Our prints
Main specs
Build Plate
Standard version: 223 x 223 x 205 mm
Extended version: 223 x 223 x 305 mm
Build Plate Temperature
50 to 100 Celsius
Nozzle Temperature
180 to 260 Celsius
Layer resolution
0.25 nozzle: 150 to 60 microns
0.40 nozzle: 200 to 20 microns
0.60 nozzle: 400 to 20 microns
0.80 nozzle: 600 to 20 microns
At Voxel Factory, we offer a free 3-hour training for two people where we pass down all the tips and tricks as well as present you all the main functions of the printer. We also offer a Safety Enclosure for Ultimaker 3D printers (made by Printed Solid) for those who want to print with more complicated materials that require a controlled temperature.
The Ultimaker 2+ is a versatile machine capable of printing with a variety of materials with precision and reliability. It has been tested with multiple filaments, including ABS, PLA, TPU, CPE, CPE+, PC and Nylon. Since the printer is an open filament printer, you can venture outside the usual materials and find the one that suits your needs.
The printer head comes with new fan caps for an optimized airflow that is aimed perfectly below the nozzle to allow needed cooling without affecting the nozzle temperature. The airflow is also calibrated to flow equally from both sides for a smooth finish.
The innovative geared feeder gives you control over the tightness of the gear when its pull the filament into the printer, an important feature to have when experimenting with multiple materials. This comes in handy when you have a project needing some flexible material (TPU).
A whole nozzle kit is included with the printer to give you the chance to start experimenting with different nozzle from the get-go. Important to note that they crafted to be easily swappable without a hassle. Nozzles sizes included are 0.25, 0.4, 0.6 and 0.8 mm. We also carry a 0.5 mm steel nozzle.
We’ve had quite some time to put the Ultimaker 2+ to the test and explore most of its features. We pimped our machine with an Olsson Ruby to print abrasive materials without worrying about the nozzle. Needless to say, we did some funky stuff and we are pleased with the quality of the prints.
So far, we’ve tested:
PLA from Ultimaker and Materio3D
TPU from Ultimaker (95A), NinjaFLex and SemiFlex
Nylon from Ultimaker and Taulman3D (910, PCTPE, 645)
T-Glase from Taulman3D (a.k.a. PETT)
Carbon Fibre from ColorFabb (XT_CF20)
Here’s a little gallery of what we printed on the Ultimaker 2+
The Olsson Ruby nozzle is tipped with real ruby which allows printing with abrasive materials without worrying for wear and tear. Originally, the Olsson Ruby was created to print with Boron Carbide, third hardest material on the planet after cubic boron nitride and diamond, which is very abrasive and quickly rips through regular metal nozzles.Read the full origin story.
The Materials
Even though we do not print with super complicated high-tech military grade materials, the Olsson Ruby is excellent for printing with regular abrasive materials likeCarbon Fiber,Glow in the dark, Metal filled filaments, glass fibers, Kevlar fiber and many more, without losing the amazing heat conductivity the brass metal has.
So far Anders Olsson tested his nozzle with over 8 kg of Carbon Fiber and there was no sign of wearing under the microscope.
We printed a few things with the Olsson Ruby on our Ultimaker 2+ withColorfabb's Carbon Fiber XT CF-20and the results were great. We made a spool holder for the Ultimaker 2+ and an extruder cover for Prusa's i3 MK2 because ours broke.
We recently entered in partnership with Ultimaker and recruited a technician who had lots of time to meddle with the new printers, especially the Ultimaker 3 extended (if you haven’t noticed our Facebook and Twitter feed). So we decided to write our thoughts and experience with the newest additions to our store. We start with the Ultimaker 3 (and extended), because it is the new powerhouse of Ultimaker and has lots of great new features.
Blog Overview:
Dual extrusion
Print Cores
Optimized material in Cura + NFC spools
Printing via Wi-Fi & Camera
Ultimaker 3 app
Print Bed
Active levelling
USB Port
Optimized cooling
Why Voxel Factory
Recommended for Businesses due to its accuracy, reliability, flexibility and ease of use.
Dual Extrusion
Ultimaker 3 comes with an auto nozzle-lifting system to enable smooth and professional dual extrusion printing. It does not require a purge block which reduces print time.
Swappable Print Cores
Ultimaker introduced easily swappable print cores for this printer. They come equipped with EEPROM chip readers which remember the size and type of your nozzle while notifying you in case of misuse. You need to calibrate them only once. They also have a LED status indicator that tells if the nozzles are hot or cold. Red for hot and blue for cold.
For the moment, there are 2 types of print cores AA and BB. AA print cores are for most filaments while BB are for PVA support material as it has a different nozzle geometry to allow better PVA flow and lower risks of clogging. Included print cores are in 0.4mm, but you can get the 0.8mm if you want faster prints.
Dual extrusion is fantastic if you want to print in different colours or materials. It also allows you to print with support material to create difficult geometrical figures that cannot be done otherwise. Best material for support is PVA which is water soluble, meaning that after printing you put the part in water and the support PVA disappears after a few hours. At the moment, PVA works great with PLA and Nylon, other combinations are experimental and therefore not recommended.
Pro-tip: After finishing a print with PVA, make sure you peel off as much PVA as you can before putting the print in the water; post-processing time will speed up.
Materials: Optimized Cura Material Profiles
Cura has now optimized material profiles for each Ultimaker printer and material that remembers the settings. Now we only need to select the correct material and the settings adjust by themselves. Worry not, you can still tweak them once selected. (Tweak them or completely change them)
Ultimaker 3 comes with an NFC reader for spools which recognizes the filament and automatically adjust the print settings on Cura (if the computer is connected to the printer). The NFC reader paired with EEPROM readers on the print core checks if the filament corresponds properly with the filament used and will notify you if there is an error.
Presently, Ultimaker 3 supports PLA, ABS, TPU, TPU95+, CPE, PC, Nylon, PVA and PP. However, with easily swappable print cores, it would be no surprise to see additional material be available without requiring major upgrades.
Print Via Wi-Fi & Camera
You can also start prints via Wi-Fi. UM3 comes with its own little router that you connect to your network and then send prints through Cura. Plus, you can monitor your 3D print remotely as the printer is equipped with a camera. If you see a problem with the print, you can pause or cancel it.
Ultimaker 3 App
We tried the Ultimaker 3 app and it’s pretty neat! First you connect to your printer and then you can import a stl. file, import a model from YouMagine or print a Ultimaker robot. I went with the robot for demonstration sake. The process is very intuitive and simple. There are not too many options for the moment, but that’s perfectly fine as you can print from your phone.
Bed: New Refined Design
The Ultimaker 3 features a heated build plate that’s lighter and stiffer, which reduces vibrations (something we all want). The glass plate is still held with classic Ultimaker pins to hold it nice.
Active Levelling
The printer comes with capacitive sensors in the print head that measures the distance between the glass bed and the nozzle. On top of that, the tilt angle is compensated by adjusting the Z height and the extrusion in the first layers. All of this to allow accurate levelling and better print adhesion.
USB Port
If you don't want to print via Wi-Fi, this printer comes with a 16 GB USB stick from which you print from. Pretty nice since some of us don’t have an SD card slot in our laptops.
New Optimized Cooling
Ultimaker 3 has a powerful, low-noise fan system. Featuring two new radial fans and fan shrouds, it creates greater pressure build-up for an improved airflow. This ensures better cooling, high quality bridging, faster print runs and smooth print surfaces.
Ultimaker 3 At Voxel Factory
With every Ultimaker 3 and 3 extended, we include:
3 hours of free training for two people (value of 250$)
One year manufacturer's warranty (if used with Ultimaker filaments)
]]>
https://www.voxelfactory.com/blogs/news/118451717-our-first-assembly-workshop-of-the-brand-new-original-prusa-i3-mk22016-06-07T15:27:00-04:002018-05-22T10:23:45-04:00Our First Assembly Workshop of the Brand New Original Prusa I3 MK2François LaheyMore]]>
*All links to MK2 are redirected to the MK3
Original Prusa i3 MK2 3D printer is now available in Montreal, Canada.
It was last Thursday, we were impatiently waiting for our first set of Prusa i3 MK2! Not only did we spam the refresh link on the UPS tracking service every 5 minutes, but our e-mail inbox and our phone was constantly ringing up with clients on the other end asking us the status of their set they bought in the first batch of pre-orders. We decided the day before to print our own pieces of our two MK2 kits in the colors of Voxel Factory. Our Ditto PRO’s from Tinkerine were printing continually for nearly 24 hours with only the change of filaments and tape for a break. As for us, we were anxious to start building it so we had to calm our nerves by slicing each part and then printing them. Obviously that wasn’t enough to calm us. But at least we had the nice smell of PLA floating in the workshop.
The day was nearing to its end when we finally received our boxes of wonders. Exacto knife in hand, we rapidly unpacked, verified, tagged and shipped the orders of clients and only then did we open our boxes. The majority of the part were in re-sealable zipper storage bags in order of assembly. Step 2 – Y Axis, Step 3 – X Axis, etc. (If you’re wondering for Step 1, it was Unpacking, we nailed that one). But dang, we were still missing a few pieces to print in order to replace the original orange pieces of the kit. So I stayed at the shop in the evening to continue the prints. Thank you Guy and Julie for keeping me company and for the pizza :-)
But that’s not all, I also asked the team at Dyze Design to reprint the extruders in Carbon Fibre and Co-Polyester (ColorFabb_XT CF-20). It was Nathan, our manager for the summer, who braved the rain in this sulky weather to bring the missing CF-20 to Dyze Design. He used this opportunity to meet the team and the shop of this Montreal company that manufactures extruders and hot ends. Their high performance hot ends and extruders with stainless steel nozzles are perfect for a job like ours. So Nathan, how was the trip? “A real start-up the way we love them! Boxes to the ceiling, tools packed like sardines and of course a few 3D printers with gamers PCs at the desks of each of the nerds ;-) Our parts will be ready tomorrow morning…”
Friday morning, Romain arrived with the extruders from Dyze Design perfectly printed to match our MK2 kits in ColorFabb traffic red and sky blue. Nathan and Raouf were already on their seats waiting to start building their first 3D printer. We downloaded the last version of the instruction from Prusa’s Research website and then it began!
Like dozens of times before, we blasted through the assembly steps one by one. But something was different this time. We were dealing with a high quality kit. Rambo mini v1.3a from Ultimachine, no soldering whatsoever, all tools were provided in the box, hot end E3D v6, new MK42 heat bed, proximity sensor for auto bed levelling and a precisely integrated Z axis leadscrew! We are faaaaar from the cheap clones we can find on eBay. In addition to that, the impression of supporting one of the pioneers in the RepRap Project, the now famous Josef Průša and his Czech company Prusa Research, was adding even more joy to our day!
Saturday morning, we only had to install all the electronics and plug in all the cables at the right place. A classic morning workshop like were used to, doing adjustments to little details and giving out assembly tricks. “Look here, the guides for the hot end cables, NO don’t use tie wraps for that, these small pieces serves to guide the LCD controller cables!”
1pm – Raouf plugs in his printer. BAAAAMM! A black smoke comes out of the box containing all the electronics… Lol, just kidding ;-) We're professionals after all. All goes for the best in the world of RepRap kits with no soldering :-P
First thing we want to test: Auto test by printer that was added to the Marlin firmware. [End stops: OK] [X, Y, Z: OK] [Hot End: OK] [Heat Bed: OK]. It doesn’t say much, but it says were OK, so we’ll believe it. We then try to calibrate the build plate with the calibration tools. You have to know that the little circles on the new MK42 heat bed are not there to make it pretty. The sensor has to come as close as possible to the centers of these circles to take a precise measure. On our part, we had to add a little thickness of a few mm on the side of the X-Carriage to arrive to perfection. Maybe we printed an old version of the carriage? Who knows, but a little piece of double sided tape did the trick.
First calibration… not obvious to comprehend. Forums, videos and a few chats with the guys at Prusa Research and finally the version 2 of the calibration GCODE is available. While the serpentine is printing (or not) on the build plate, we have to adjust the Z offset with a function named Live Adjust Z. That’s it, now it works like a charm! We are ready to try out our first piece :-) BATMAN! The piece doesn’t stick super well, so we used a LITTLE bit of 3DLac on the PEI sheet using a paper towel and voila!
Now comes the time to print something other than the GCODE included on the SD card. Being on Windows 10, I downloaded the executable file found on the “drivers” page of Prusa Research’s website. Pronterface, NetFab, Firmware updater, ColorPrint are now installed in addition to a pre-configured Slic3r for our i3 PLUS and i3 MK2 with basic configs for multiple filaments we use. There are few things more satisfying than installing all the necessary drivers and softwares with one click. Minor discomfort: as usual, Slic3r crashes regularly on Windows (7, 8 or 10), but I’m not teaching you anything new here. The default printing configurations are acceptable, but leaves a few spaces on the soft curves and over extrudes on top/bottom.
Tuesday morning – since I don’t know the Slic3r setting or settings that’s are affecting my print, I’ve decided to test a piece with basic configs in CURA 15.05.6. “Add a new machine, Other, Custom, Prusa i3 MK2, 250, 210, 200, 0.4, Heat Bed – Check, Finish!” As usual, if you just installed CURA, go in Tools and change the evil and loathsome “Print one at a time” for “Print all at once”. How many extruders and hot ends were slayed by this default config? *Bell rings* The moment of truth has arrived! Will I be able to print parts that are pleasing to my eye (and soul) with our very sexy red MK2?
It appears so! Look at the picture comparing the now famous Treefrog from MorenaP. :-)
]]>
https://www.voxelfactory.com/blogs/news/69590853-dyze-design-des-tetes-chauffantes-et-extrudeurs-haute-performance-canadiens2015-12-07T16:38:00-05:002018-02-22T17:10:53-05:00Dyze Design: Des têtes chauffantes et extrudeurs haute performance CanadiensFrançois LaheyMore]]>
Le jeudi 19 novembre 2015, deux membres de l'équipe de Dyze Design, nouvelle entreprise montréalaise de fabrication de pièces d'imprimantes 3D haute performance, venaient nous présenter leurs premiers produits, la tête chauffante DyzEND et l'extrudeur DyzeXtruder.
Nous avons immédiatement compris que nous avions affaire à des produits haut de gamme et construits dans un souci du détail inégalé jusqu'à présent. Jean-François Désilets, président chez SphèreCo et moi même les avons bombardés sans relâche de questions techniques et toutes les réponses furent au-delà de nos attentes. En voici de brefs extraits :
Q : Comment l'ensemble DyzEND et DyzeXtruder se différencie de la concurrence?
R : C'est surtout la capacité de nos produits à imprimer des matériaux exotiques tels que les différents filaments flexibles comme le très souple NinjaFlex, des matériaux conducteurs et des filaments renforcés avec de la fibre de carbone tel que le ColorFabb XT CF20.
Q : De quels matériaux est composée votre tête chauffante?
R : La DyzEND est composée de plusieurs différents métaux; les buses interchangeables (à froid !!! 0o) sont faites d'acier inoxydable 410. Elles sont présentement offertes en 0.35mm et 0.5mm et nous travaillons actuellement à offrir un kit de buses de .2mm / .4mm /.6mm et .8mm pour satisfaire tous les besoins de nos clients. Le bloc chauffant est en aluminium et la barrière thermique est faite de Titane. L'ensemble de la tête chauffante est conçu pour donner des performances optimales dans toute la gamme de températures des filaments disponible sur le marché du PLA à 190°C au Polycarbonate à 315°C jusqu'aux autres filaments à venir (500°C).
Suite à notre entrevue avec Patrick et Philippe, j'ai personnellement défié l'équipe de Dyze Design de m'imprimer des pièces en ColorFabb XT CF20 et en NinjaFlex. Aussitôt dit, aussitôt fait! J'ai sur mon bureau une main parfaitement imprimée en NinjaFlex 1.75mm et deux belles roues imprimées en XT CF20 dans des buses .35mm à 100 microns, direct drive et bowden tube. Excellent!
L'équipe de Dyze Design a même remporté le prix Banque Nationale décerné dans le cadre de l'émission "Alexandre et les conquérants" Félicitation à toute l'équipe et bon succès!
Voxel Factory est fier de supporter cette nouvelle entreprise locale et nous offrons dès maintenant les produits suivants :
]]>
https://www.voxelfactory.com/blogs/news/15849452-voxel-factory-now-selling-the-canadian-tinkerine-ditto-pro-3d-printer-in-montreal-quebec-canada2014-11-12T14:38:00-05:002018-02-22T17:09:29-05:00Voxel Factory now selling the Canadian Tinkerine Ditto PRO 3D Printer in Montréal, Québec, Canada!François LaheyMore]]>
Printed Solid (Newark, Delaware), Impression Triple D (Québec City) and Voxel Factory (Montréal, Québec) are all proud to announce that they now start selling, support and repair the Canadian made Tinkerine Studios Ltd. Ditto PRO 3D Printer :-)
Simple, good looking and affordable, the Ditto PRO is the perfect 3D Printer for beginners, families. schools, artists and architects! Also work very well with ColorFabb filament that we already all offer!
Buy your Tinkerine Ditto PRO 3D printer in Montréal, Canada at Voxel Factory and get 2 hours hands on training for free !
]]>
https://www.voxelfactory.com/blogs/news/14116569-colorfabb-new-_xt-formula-and-woodfill-fine-now-available-at-voxel-factory2014-05-12T16:58:00-04:002018-02-22T17:08:12-05:00ColorFabb NEW _XT formula and WoodFill FINE now available at Voxel Factory!François LaheyMore]]>
You need stronger material than PLA but you don't like to work with ABS? ColorFabb _XT new formula is for you. Better bridging than before, almost no odour and less warping than ABS! Easier to extrude at 260c but also print at 240c with J-Head at slower speed ( Approx 30mm/s is a good start). Woodfill FINE also available in 1.75mm and 3mm on 750gr. spool :-)
]]>
https://www.voxelfactory.com/blogs/news/14105797-voxel-factory-is-now-open-6-72014-05-11T14:35:00-04:002018-02-22T17:06:59-05:00Voxel Factory is now open 6/7 :-)François LaheyMore]]>
Monday to friday 9:00 - 17:30 Saturday 9:00 - 16:30
See you soon :-)
]]>
https://www.voxelfactory.com/blogs/news/10820537-taulman3d-t-glase-now-available-voxel-factory2013-12-12T15:05:00-05:002018-02-22T17:05:18-05:00Taulman3D T-GLASE now available @ Voxel FactoryFrançois LaheyMore]]>
]]>
https://www.voxelfactory.com/blogs/news/7536302-voxel-factory-much-more-than-an-online-store2013-03-19T13:32:00-04:002018-02-22T17:03:18-05:00Voxel Factory, much more than an online store!François Lahey
Voxel Factory is more than just on-line.
On March 9th and 10th 2013, Voxel Factory held its first on site I3 workshop. On the first day, all attendees completed assembly of a Prusa Mendel I3 with dual extruder on their own. By the second day, they were printing! Easily accessible, Voxel Factory is conveniently located by the Jacques-Cartier bridge and is open from 9am to 5pm, Monday to Friday. Need printer parts or printing materials fast? Come by and see what's in stock. We'll help you make sure everything fits your needs perfectly. Buy on site and avoid shipping fees!
]]>
https://www.voxelfactory.com/blogs/news/6601539-build-your-own-3d-printer-workshop2012-09-18T19:57:00-04:002018-02-22T17:01:04-05:00Build your own 3D printer WORKSHOP!François LaheyMore]]>
François Chagnon from FouLab and François Lahey from Voxel Factory are very proud to offer the first ever RepRap 3D printer workshop in Canada! Build your own "Prusa Mendel I2" 3D printer in a 2 days workshop and learn how to calibrate, operate, maintain and get the best possible results with it. This is a unique chance to get a RepRap up & running lightning fast! Save hundreds of hours searching blogs and forums to setup your printer. François Chagnon, your teacher for the workshop, has already built many different RepRap and modified some of them.]]>


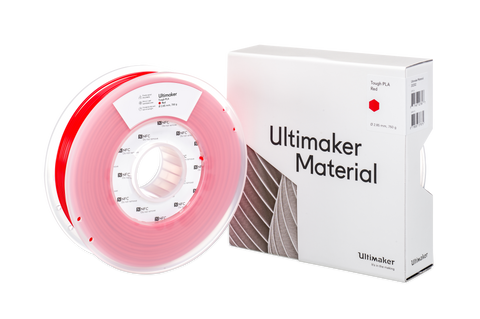 Ultimaker Tough PLA - A technical PLA filament optimized for printing technical models at larger sizes such as functional prototyping, tooling and manufacturing aids, with no delamination or warping.
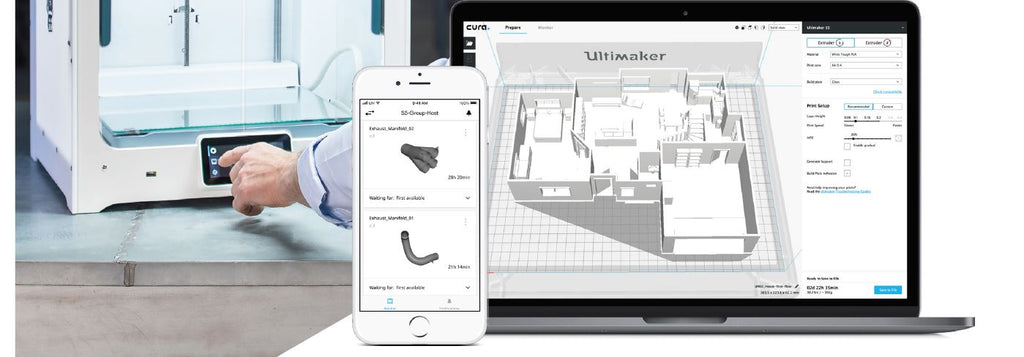


 Form Cure is the machine created by Formlabs to complete its 360 solution to SLA 3D printing. As explained to us by the engineers who created both the Wash and Cure, there needs to be both UV lights and heat to cure the parts to max proprieties.
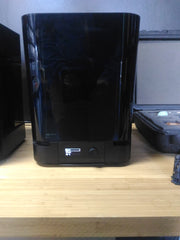
 One thing to note, if you decide to leave support on the prints while curing, there might be deformation during the curing process due to heat, depending on the material use and the complexity of the print. We had a case like that with the Durable resin where the supports deformed. This can be explained by the low heat resistance of the Durable resin and the insufficient amount of support in the print. We asked the materials experts when we visited them and they advised us to, first, if possible to take off supports and, second, to reduce the heat by a few degrees if the supports are really needed to hold the piece together. Another option is to add more support to support the piece from gravitational deformation.


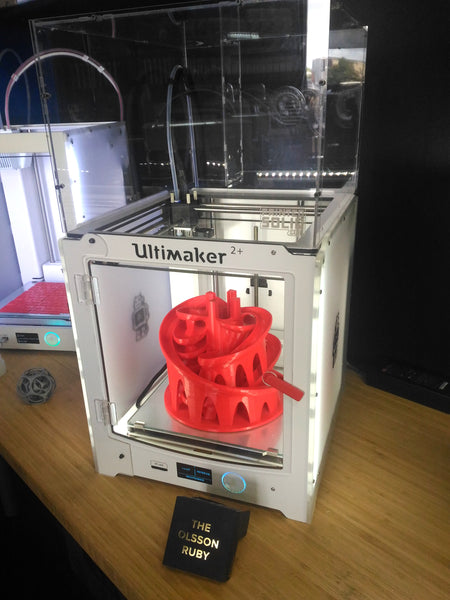
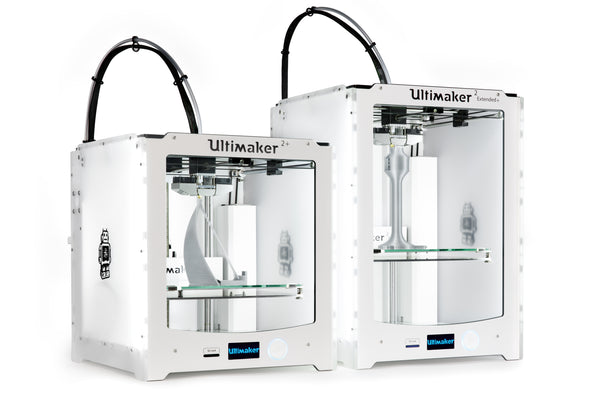
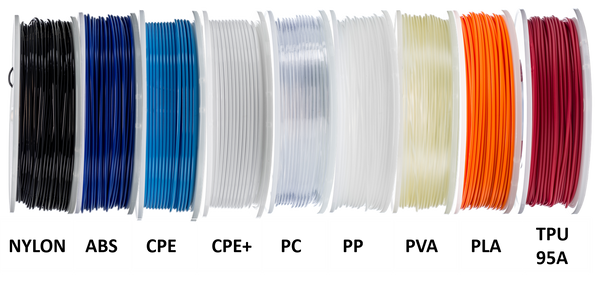

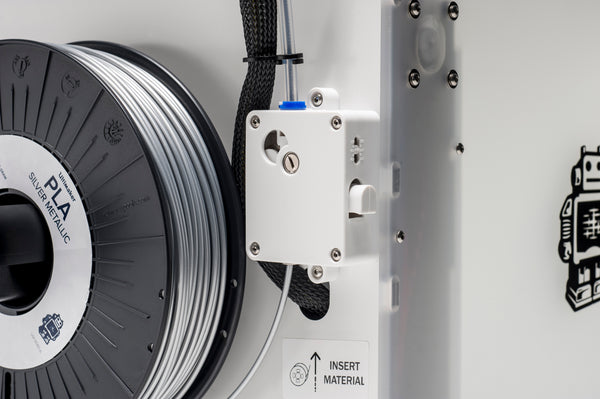
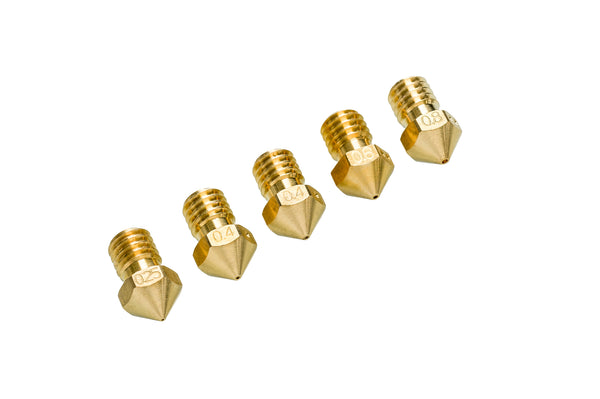
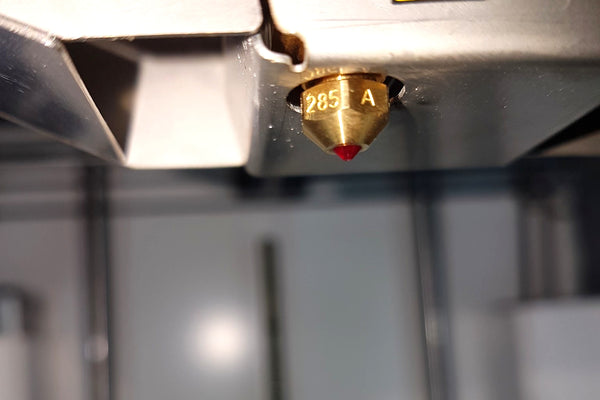
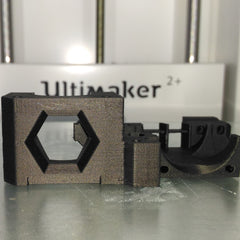
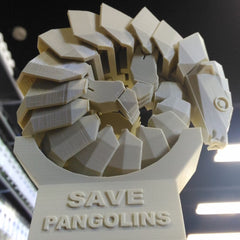
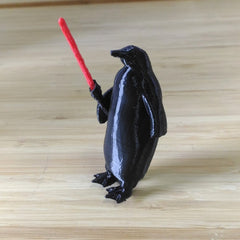

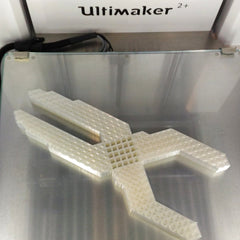
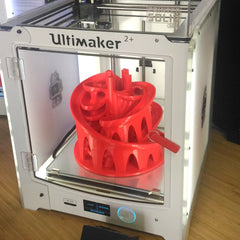

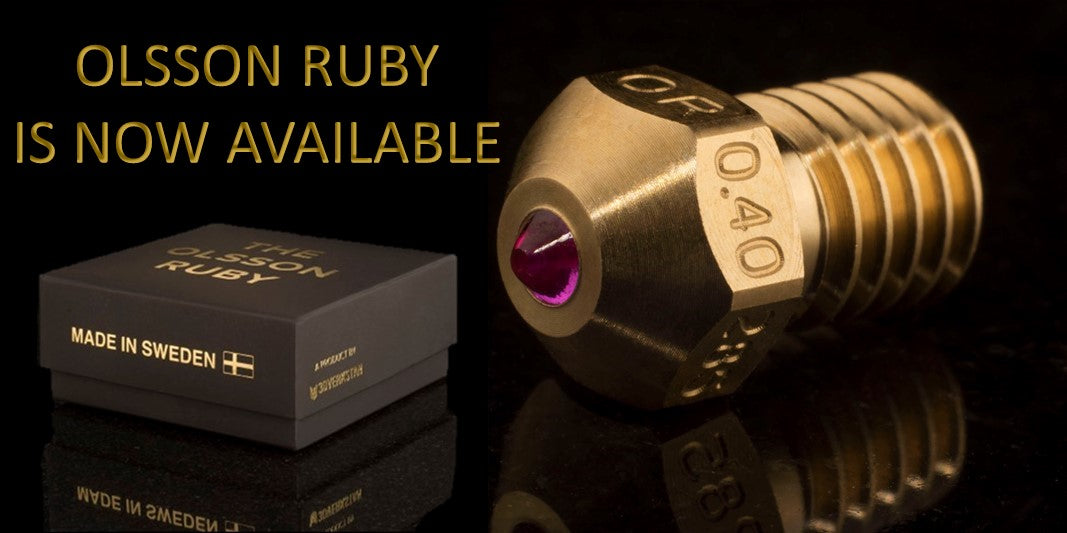
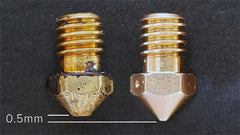
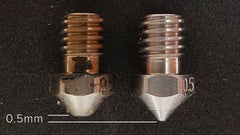
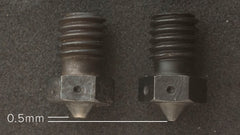
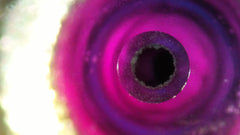
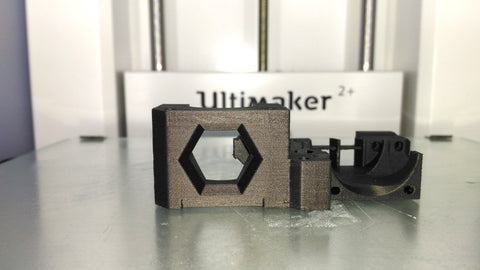
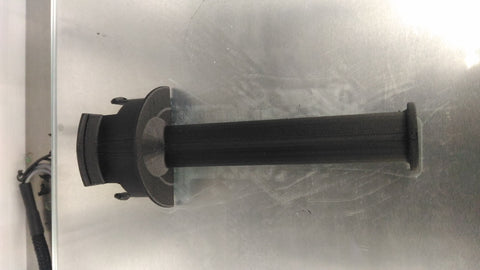
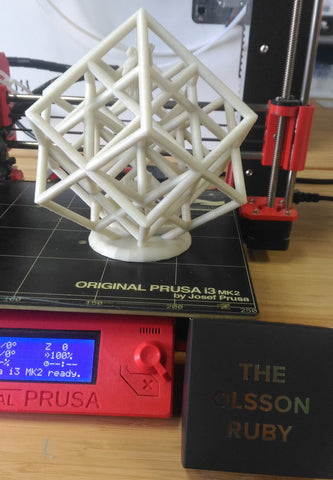

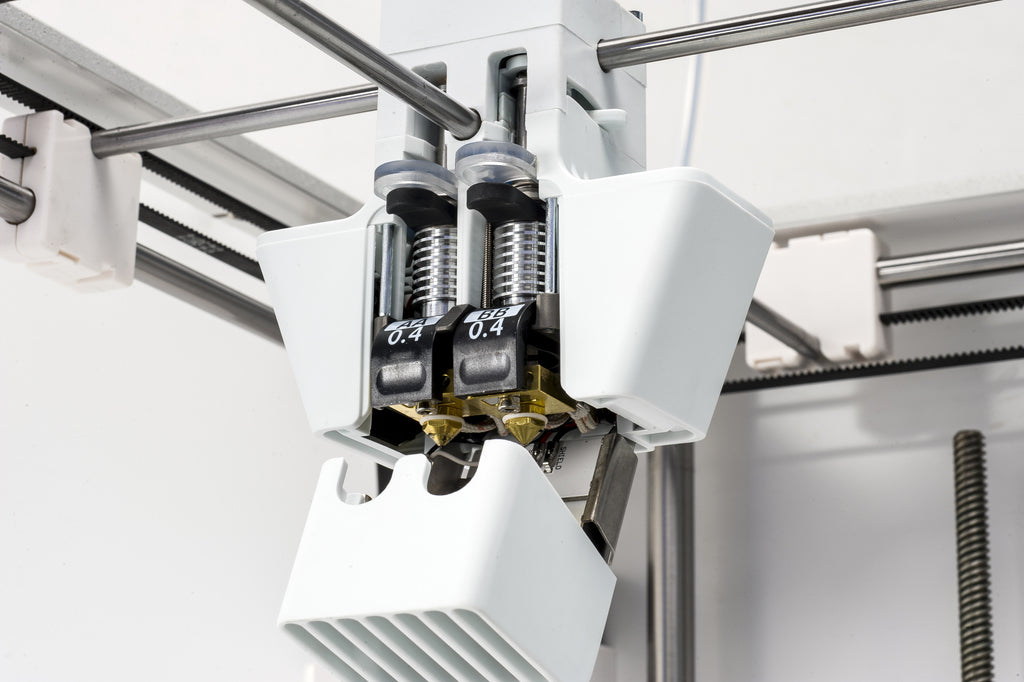
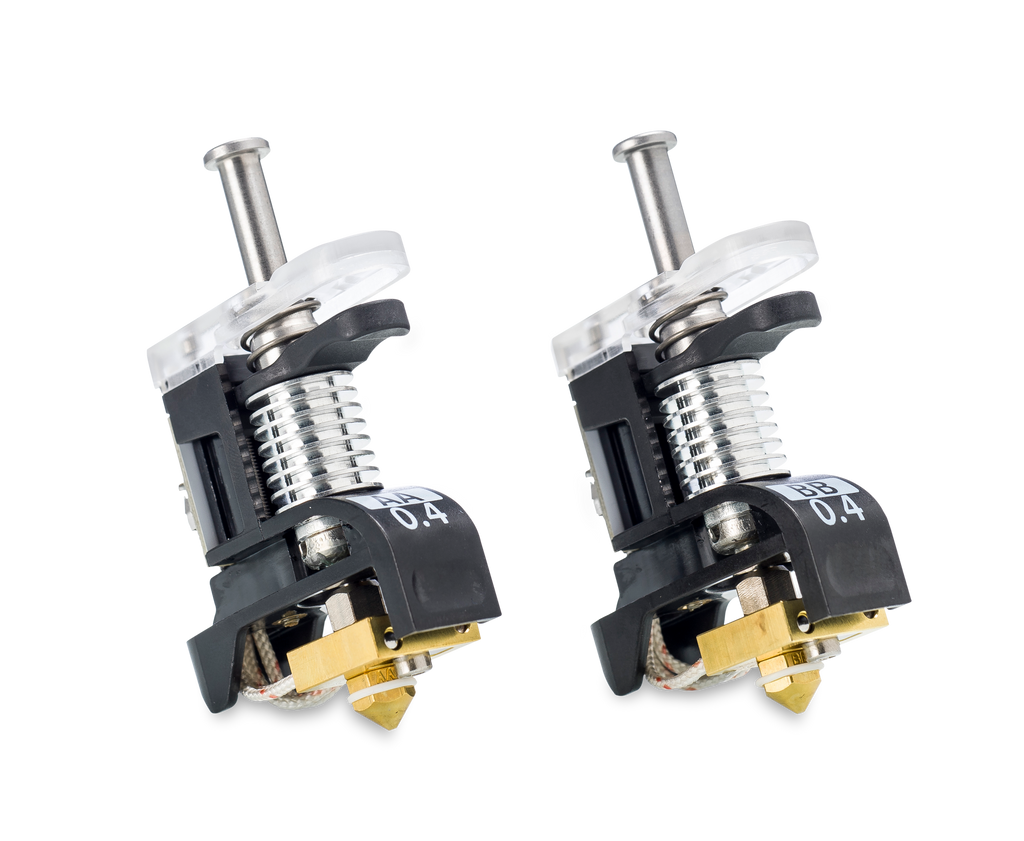
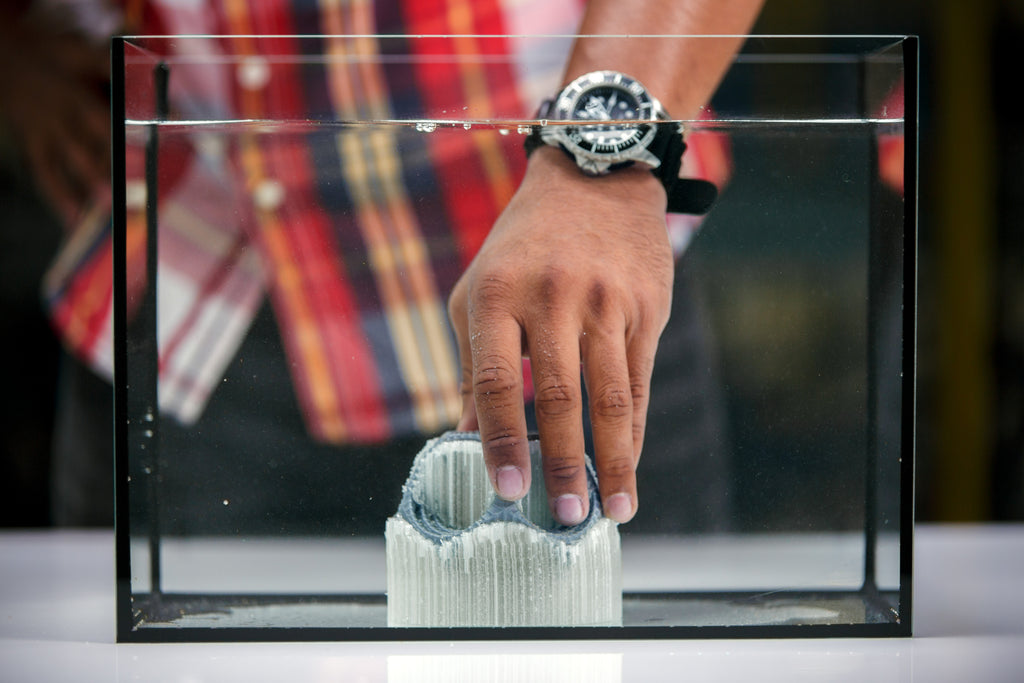

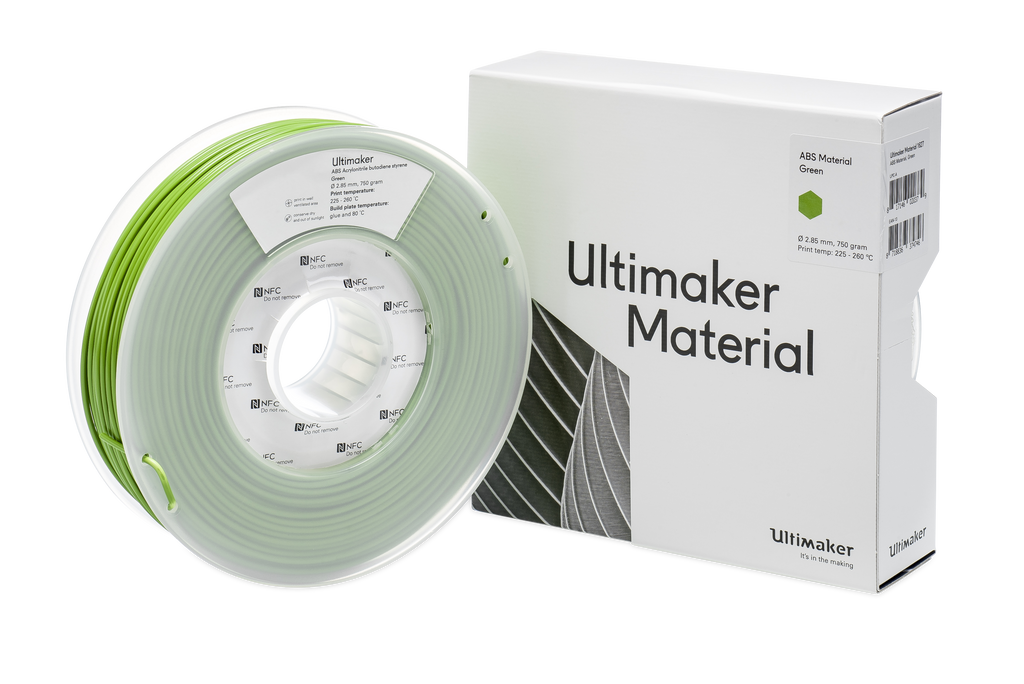
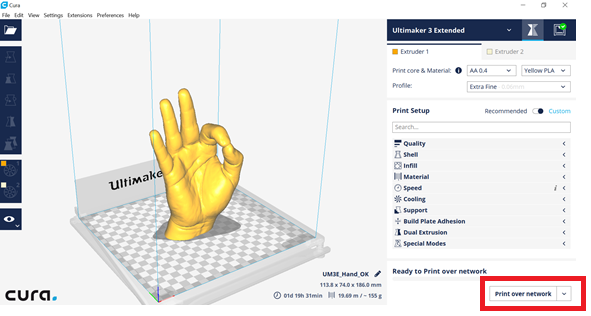


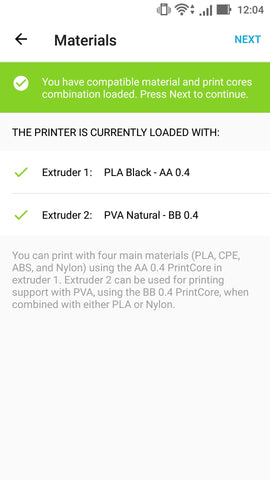

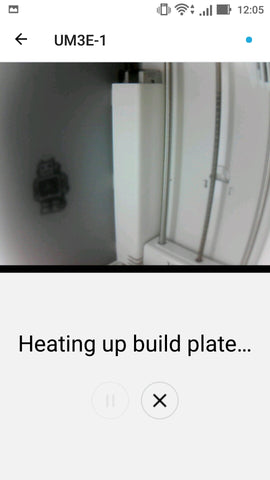

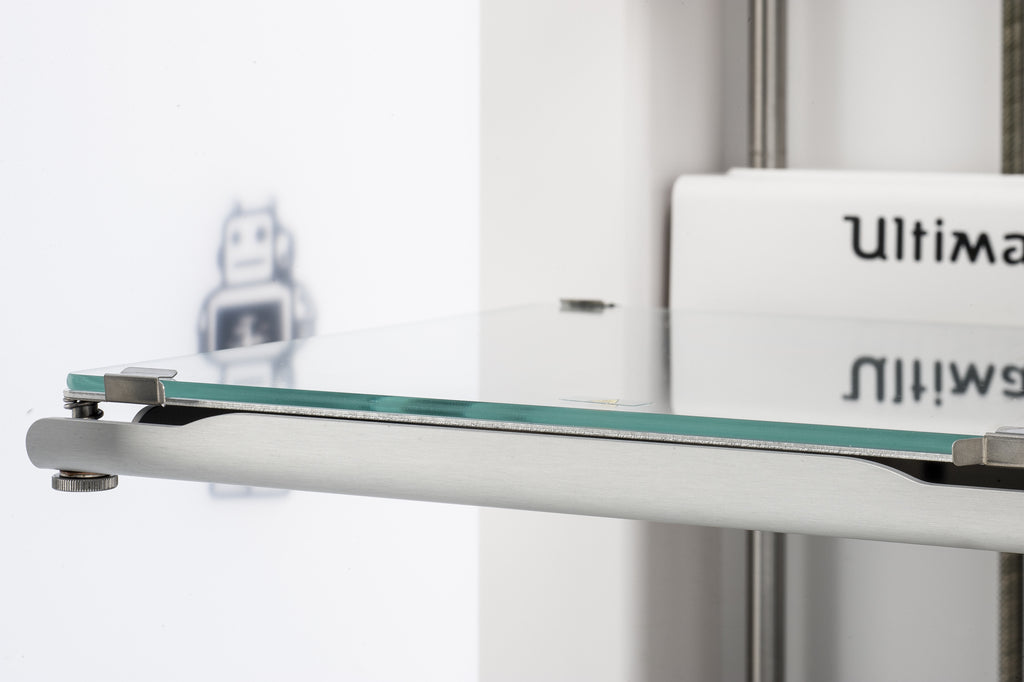
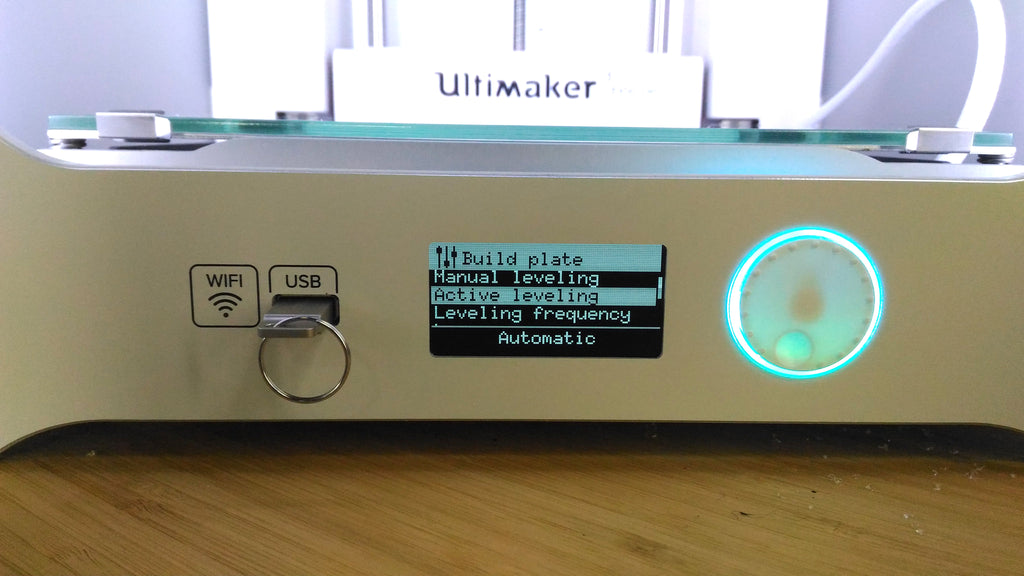
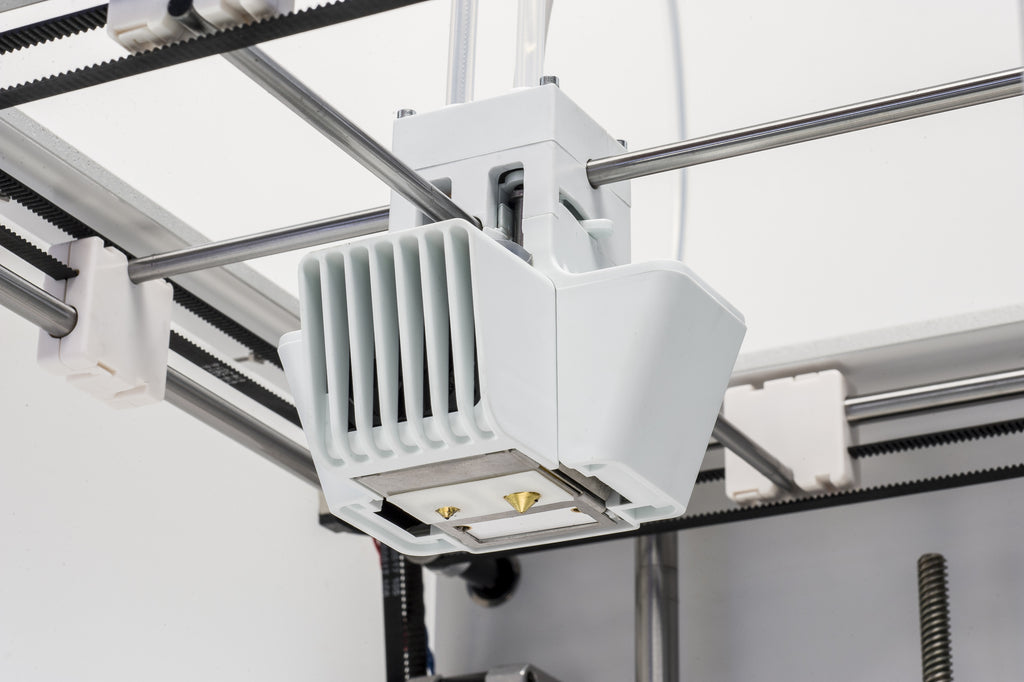
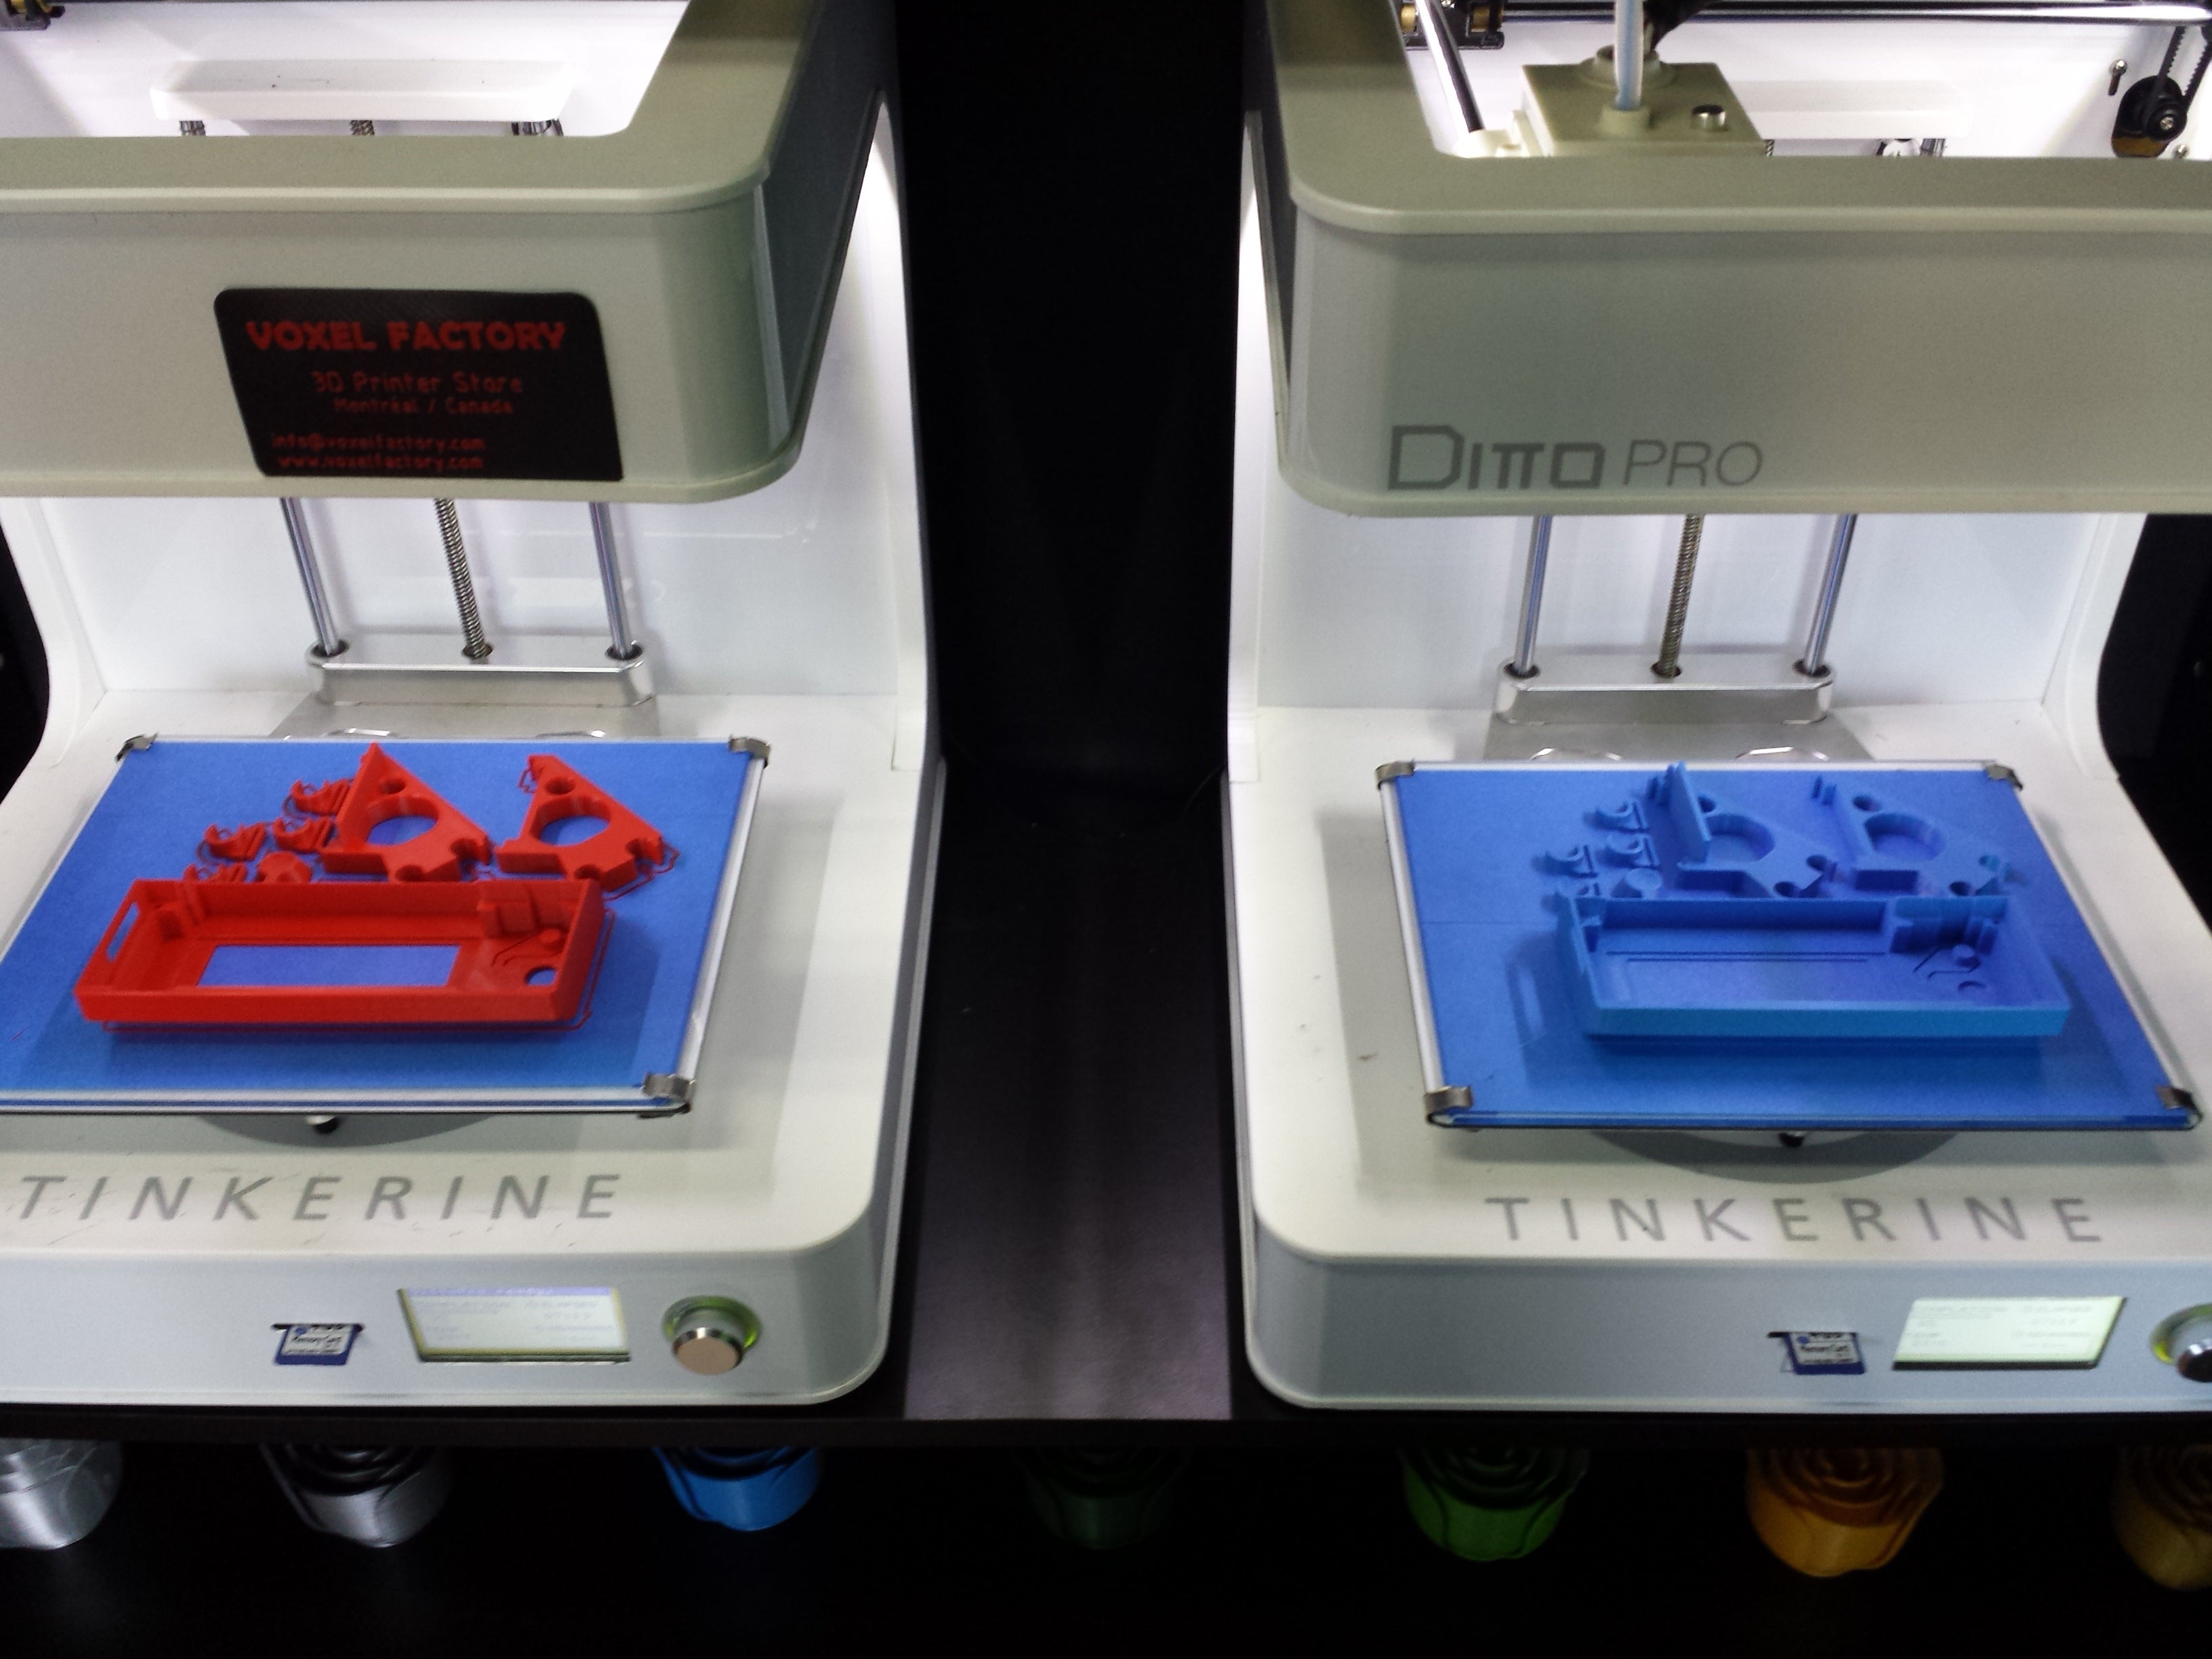
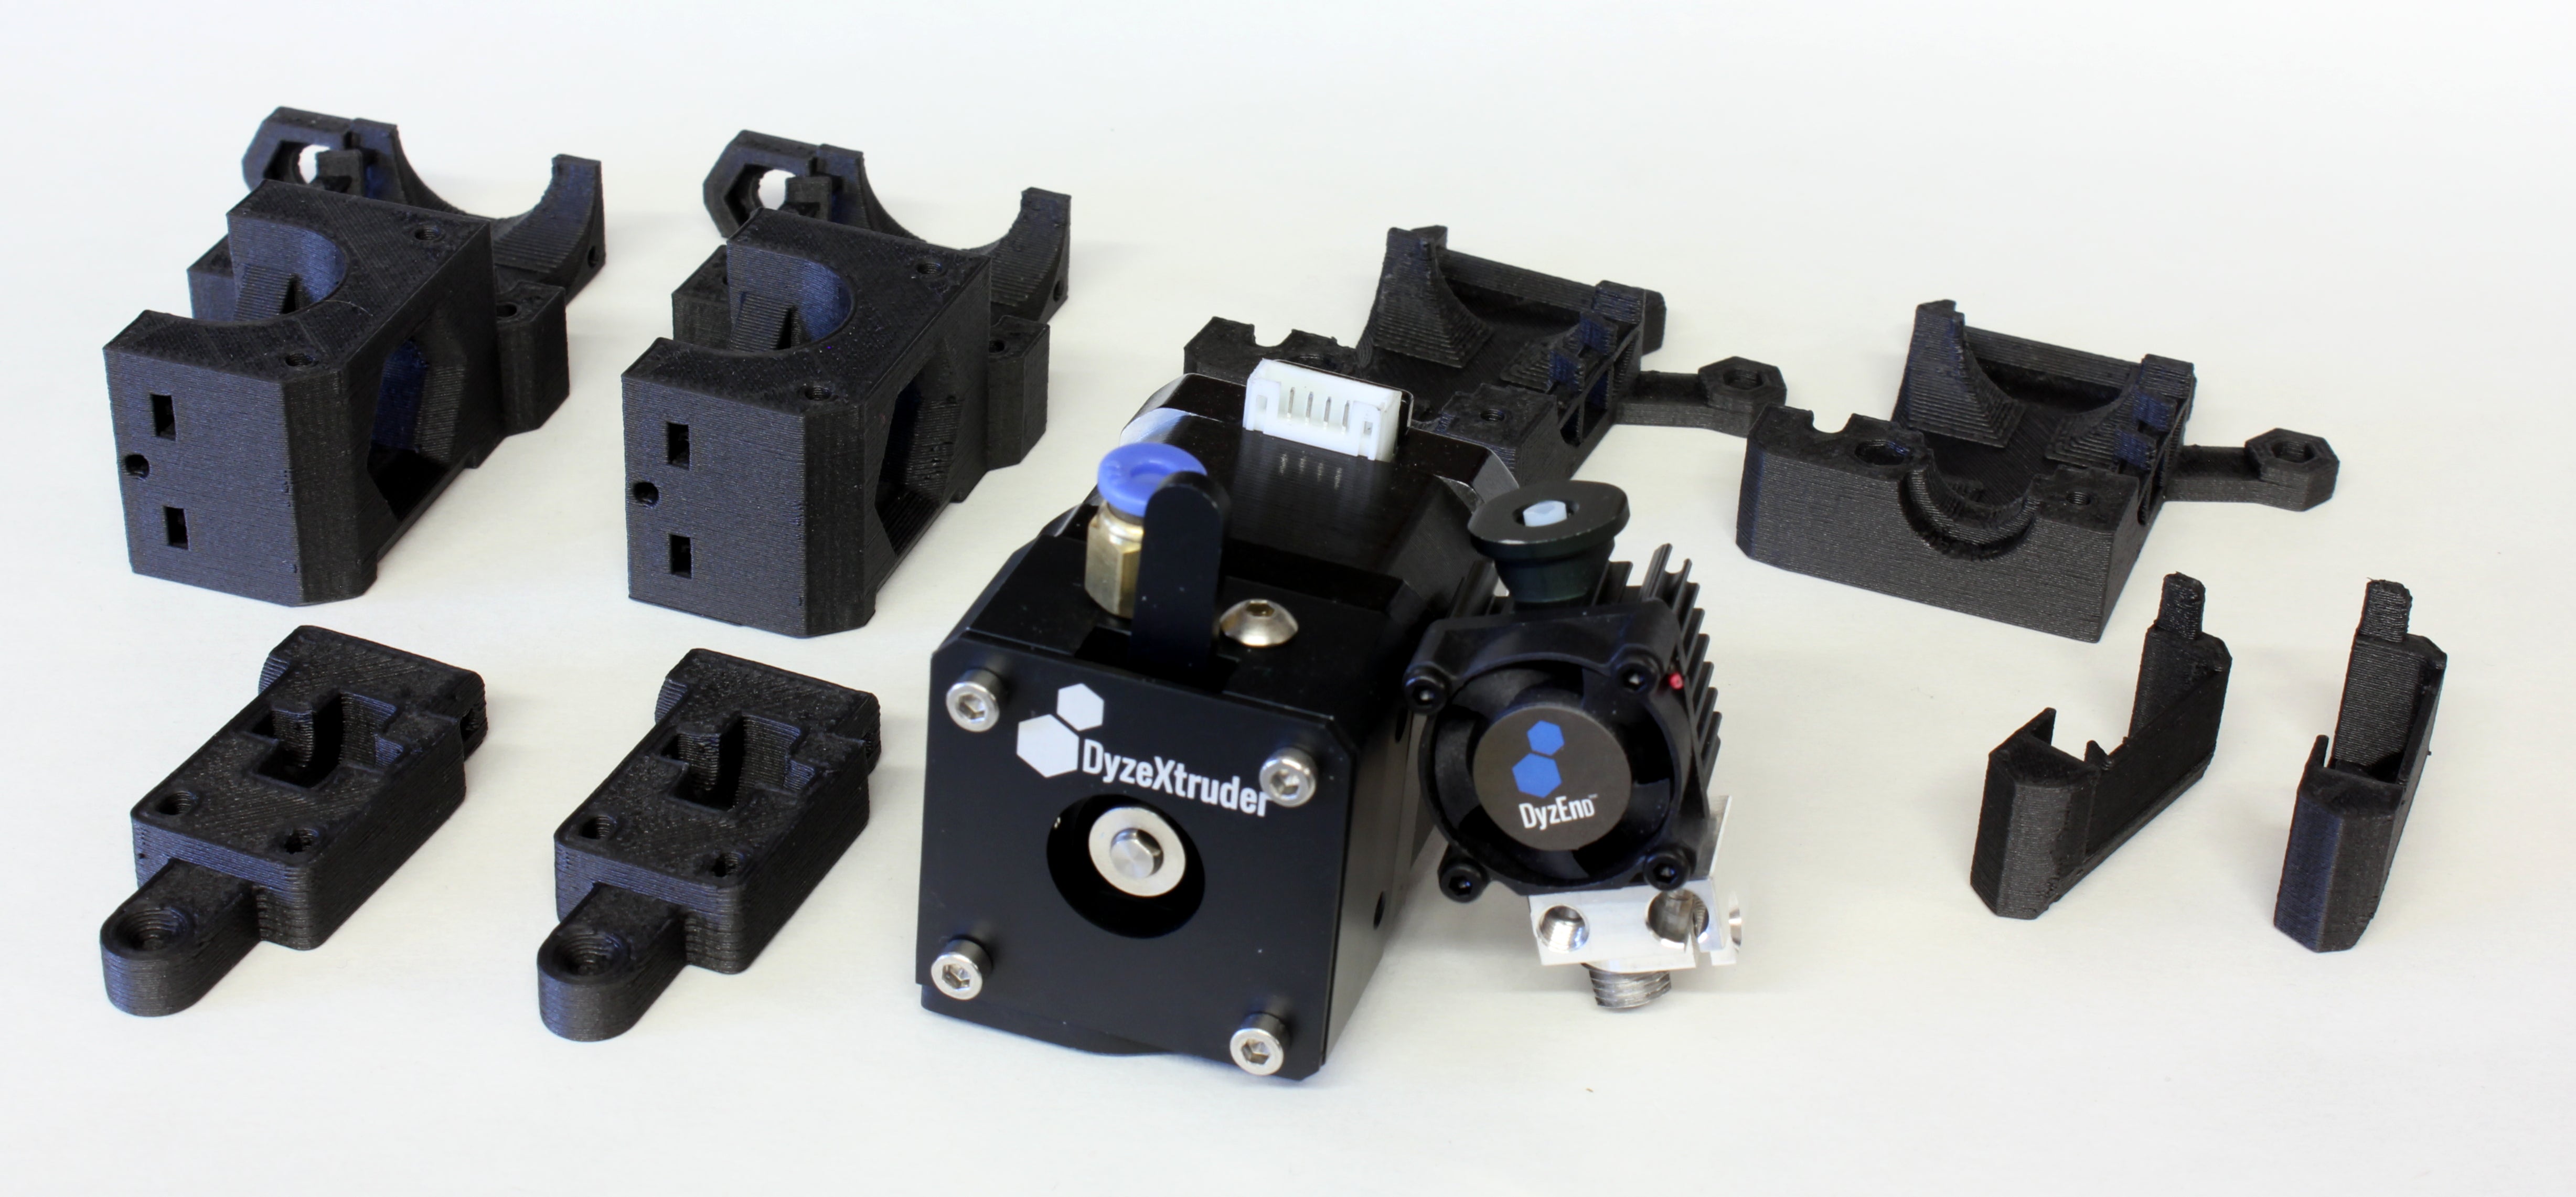
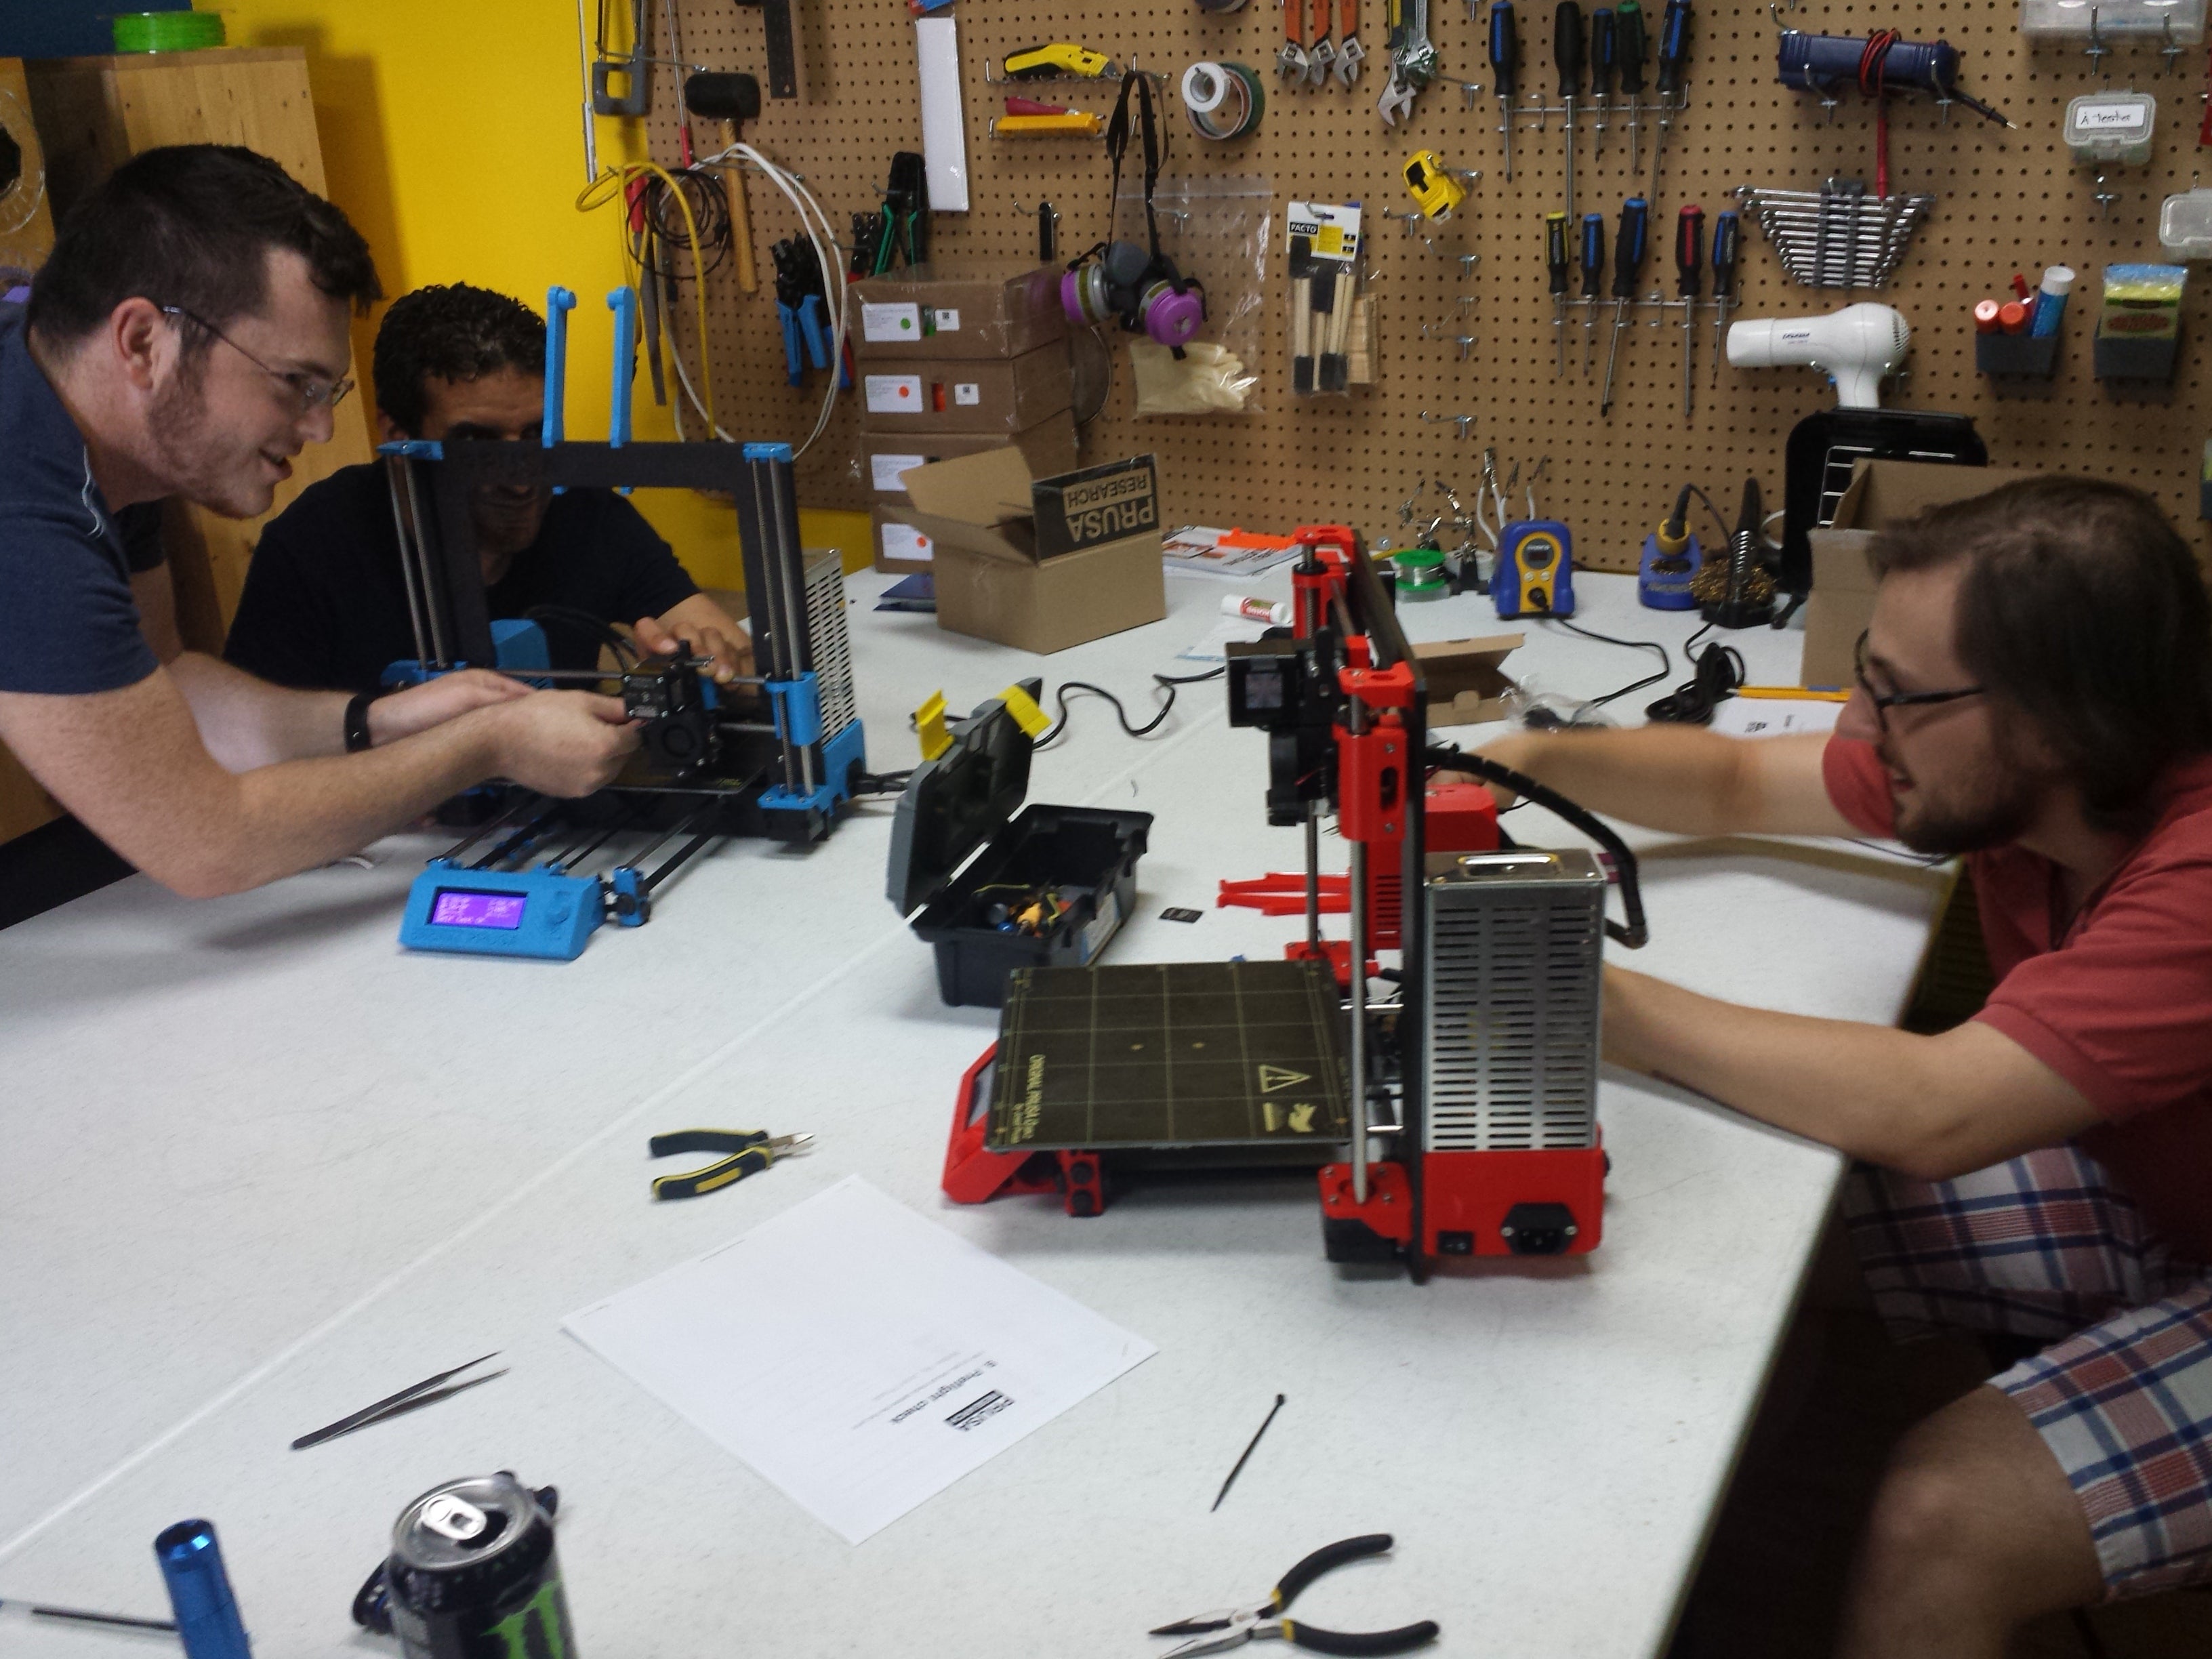
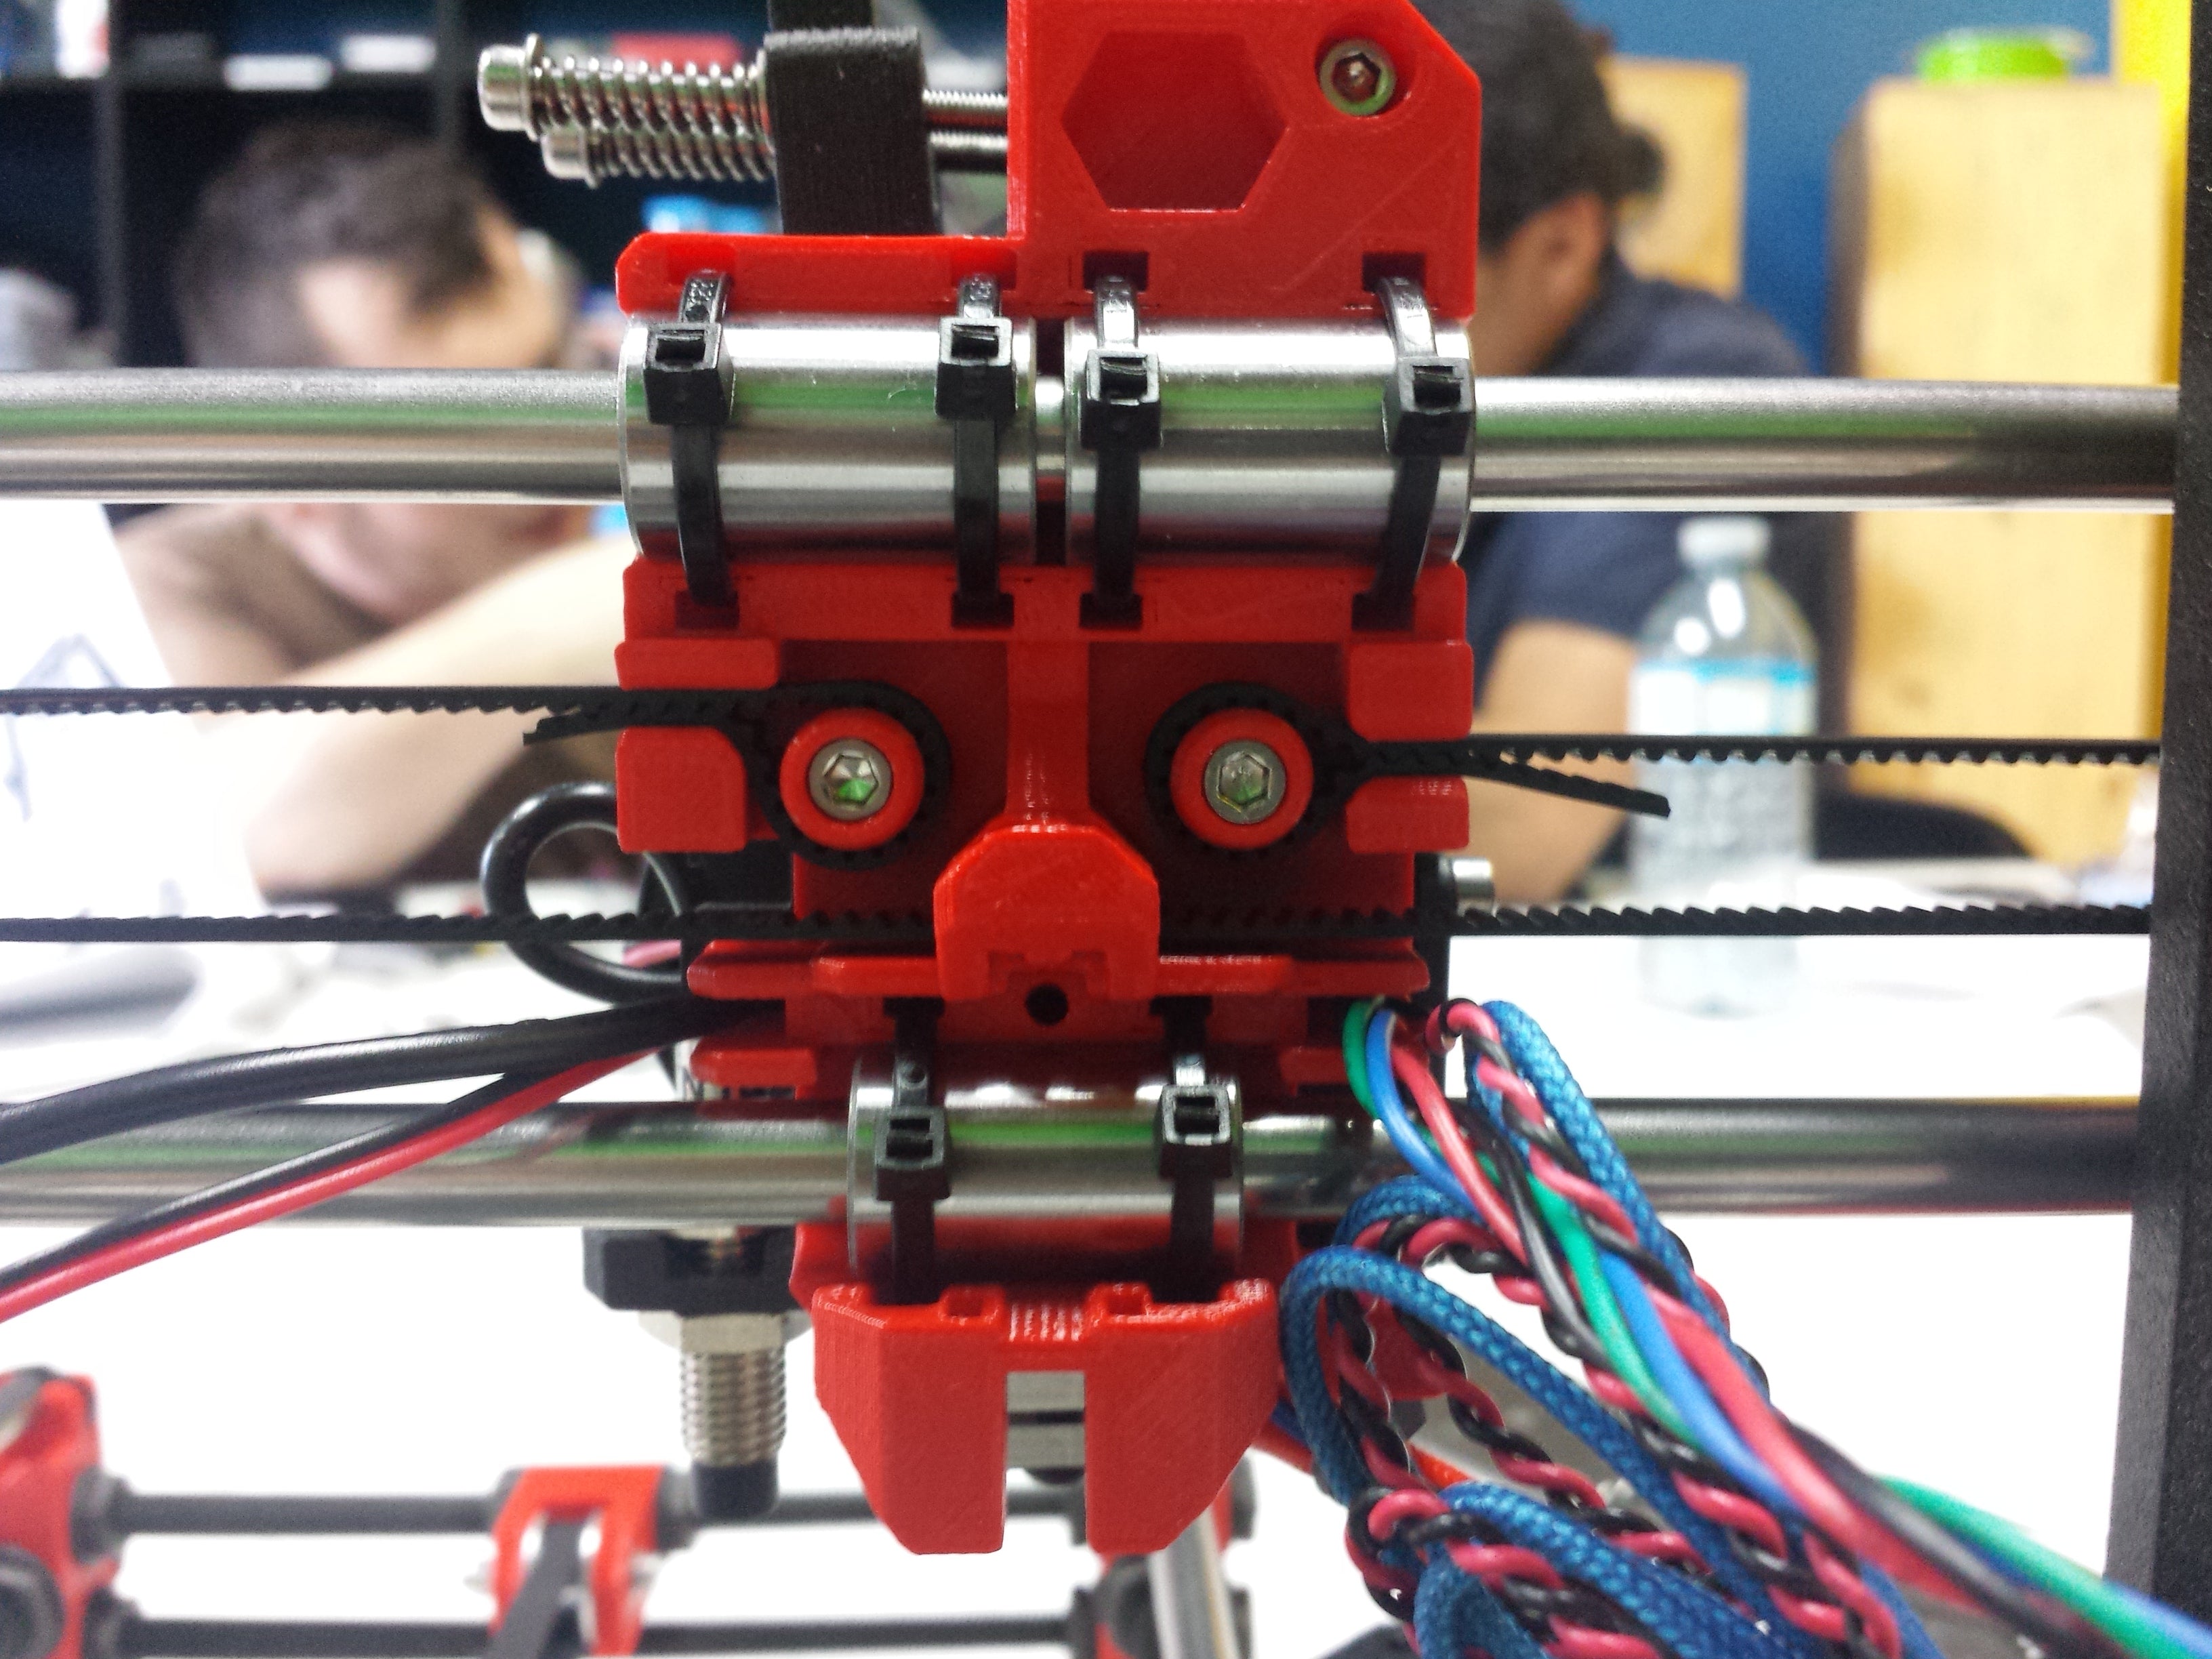
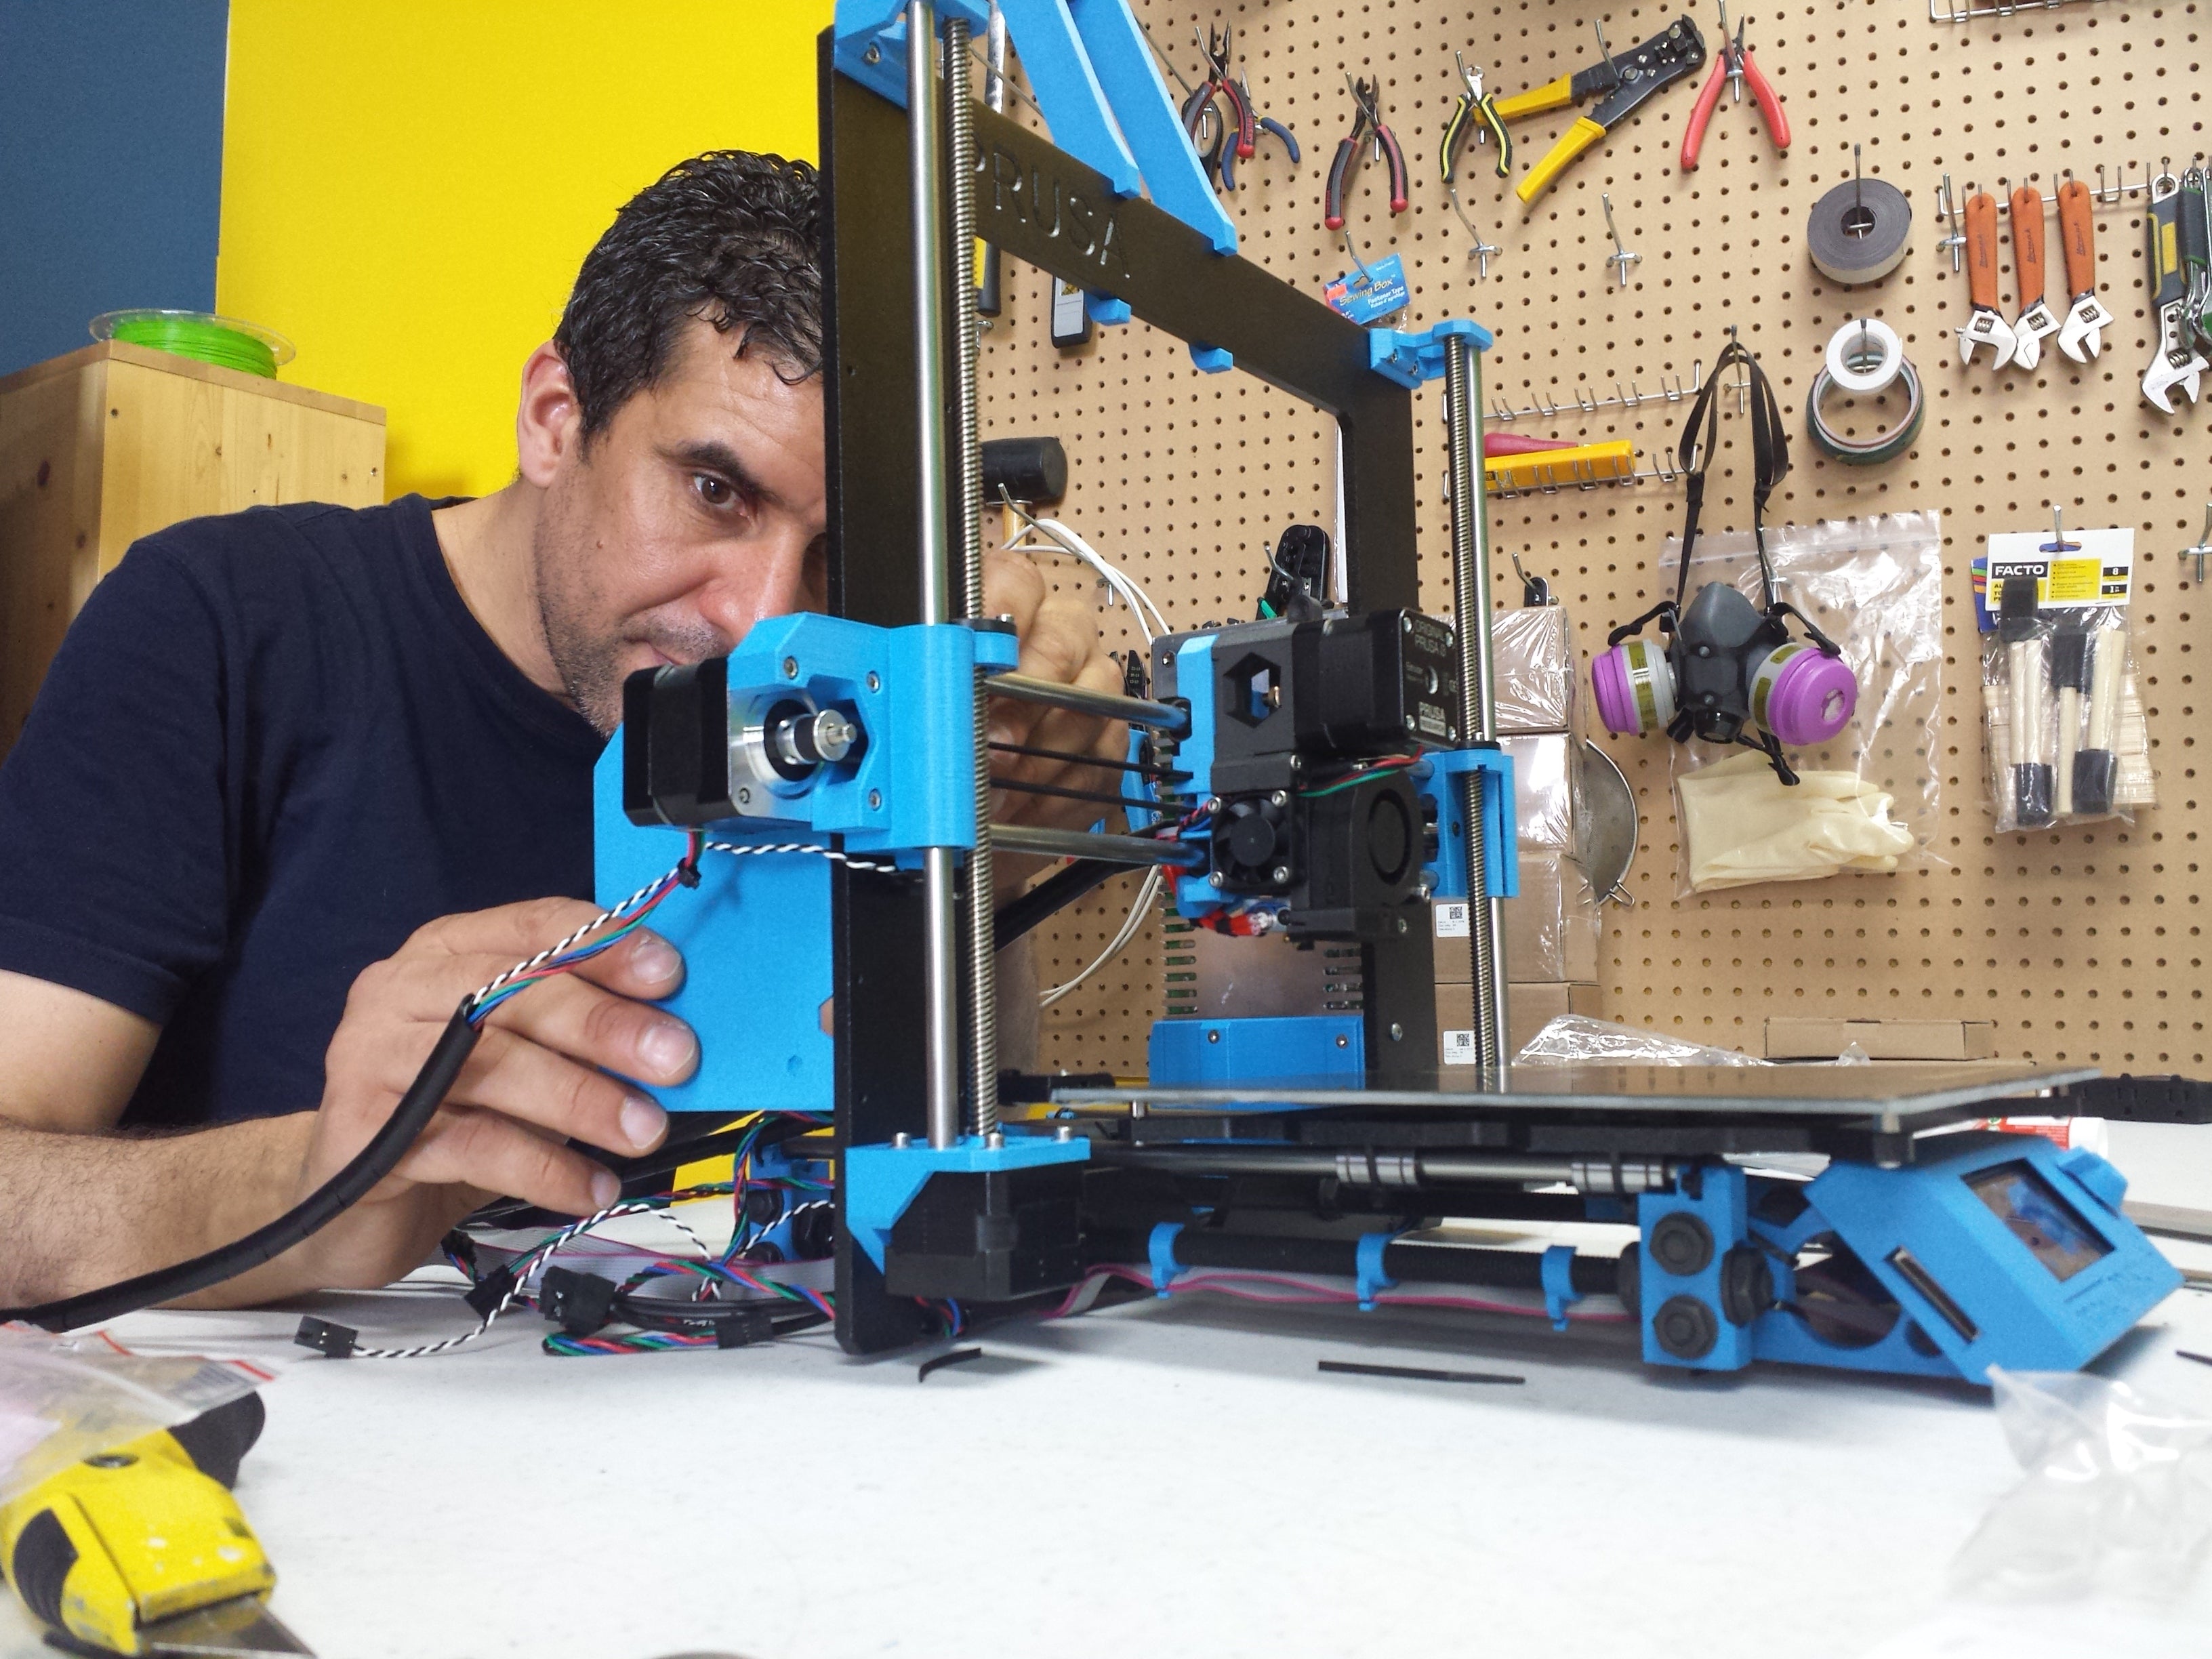

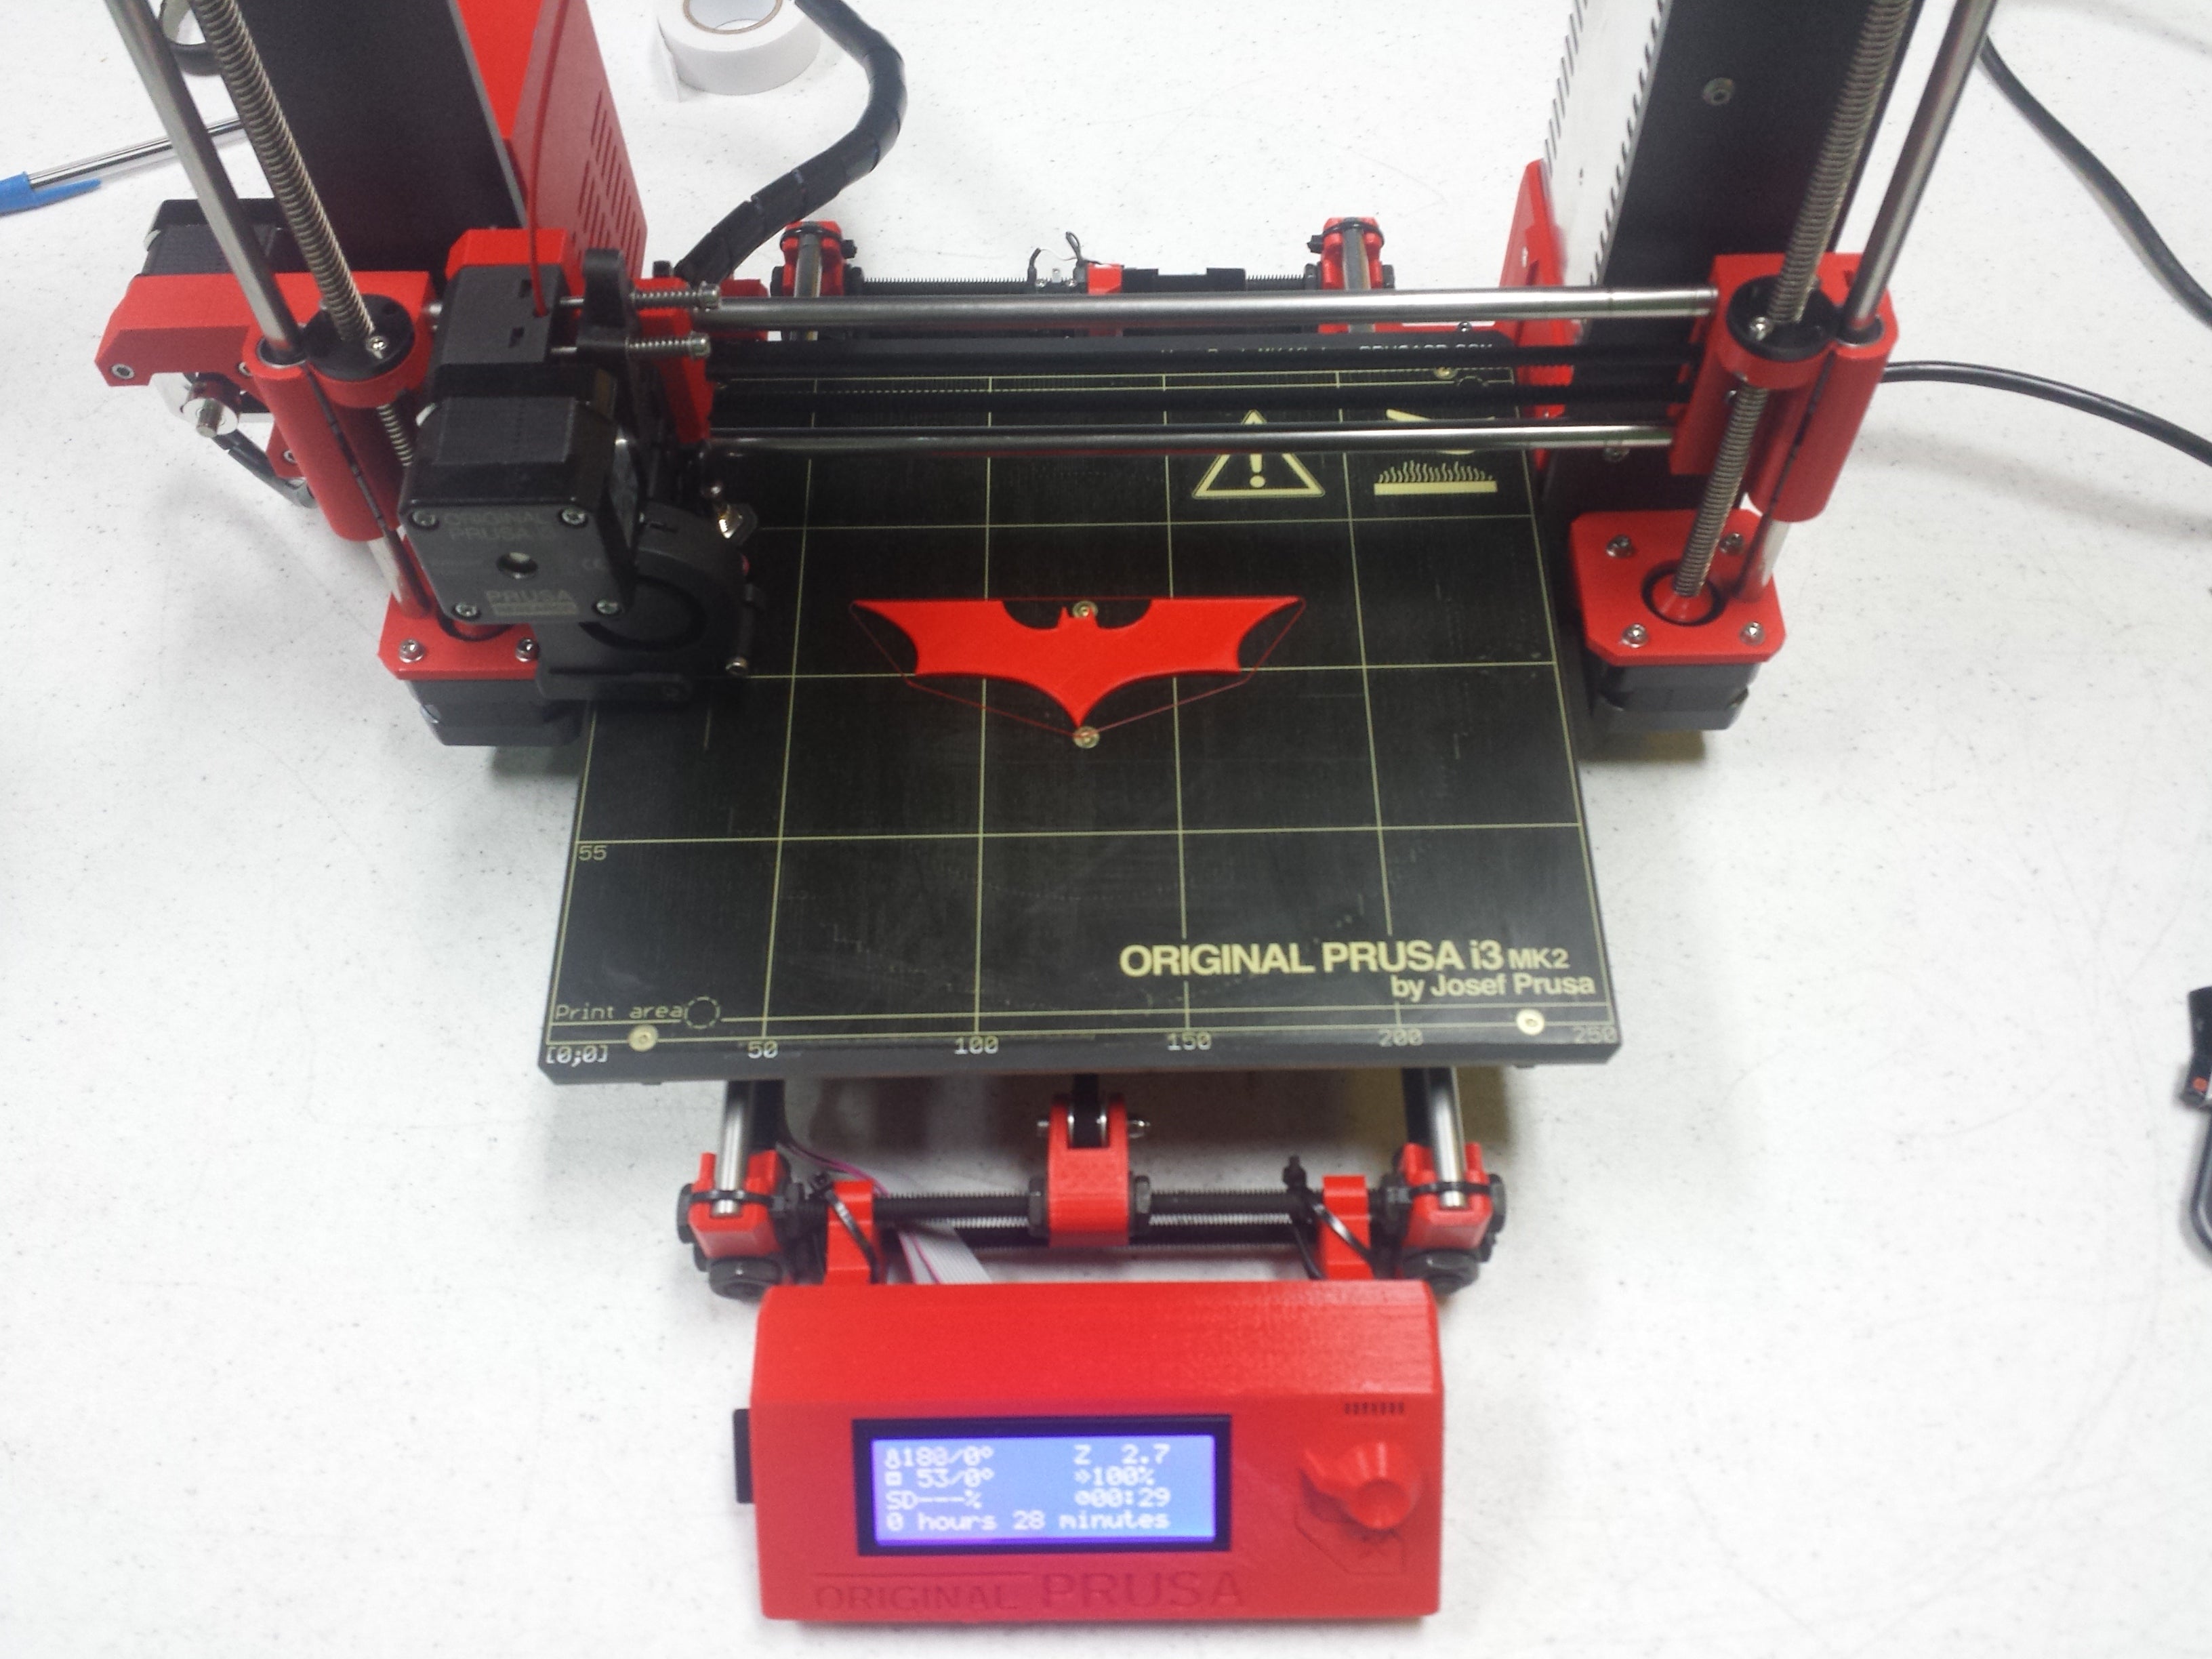
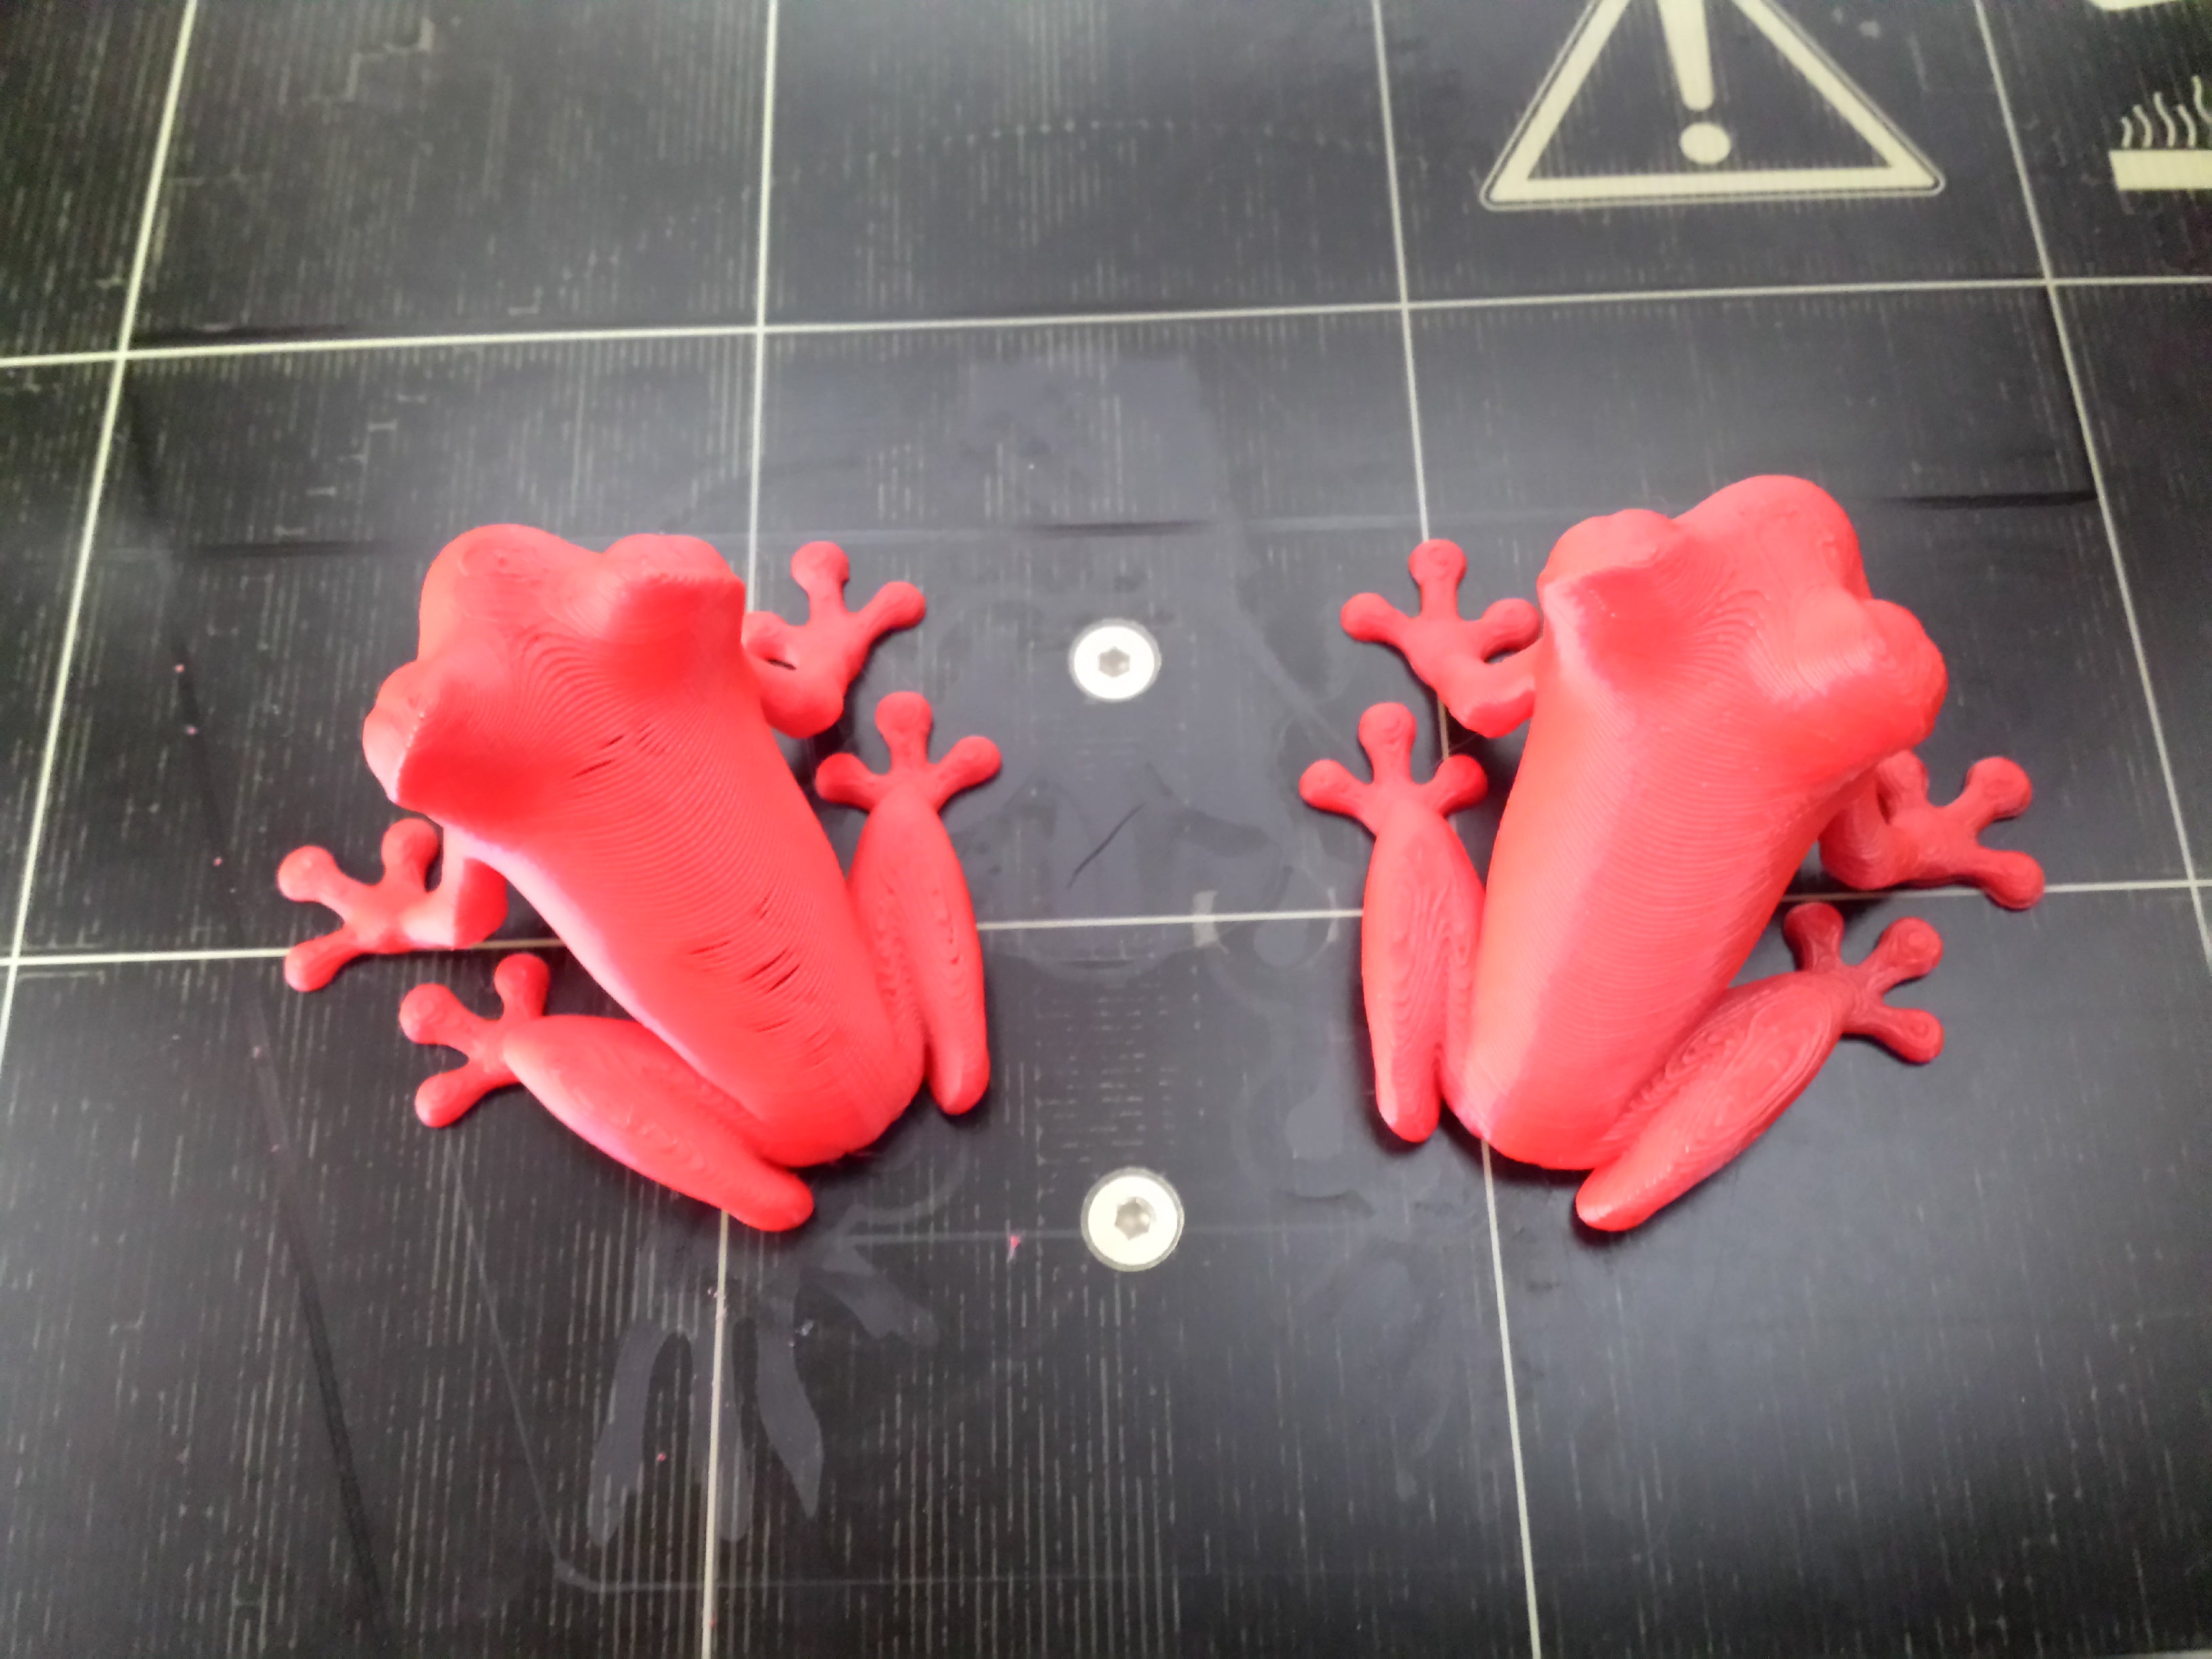
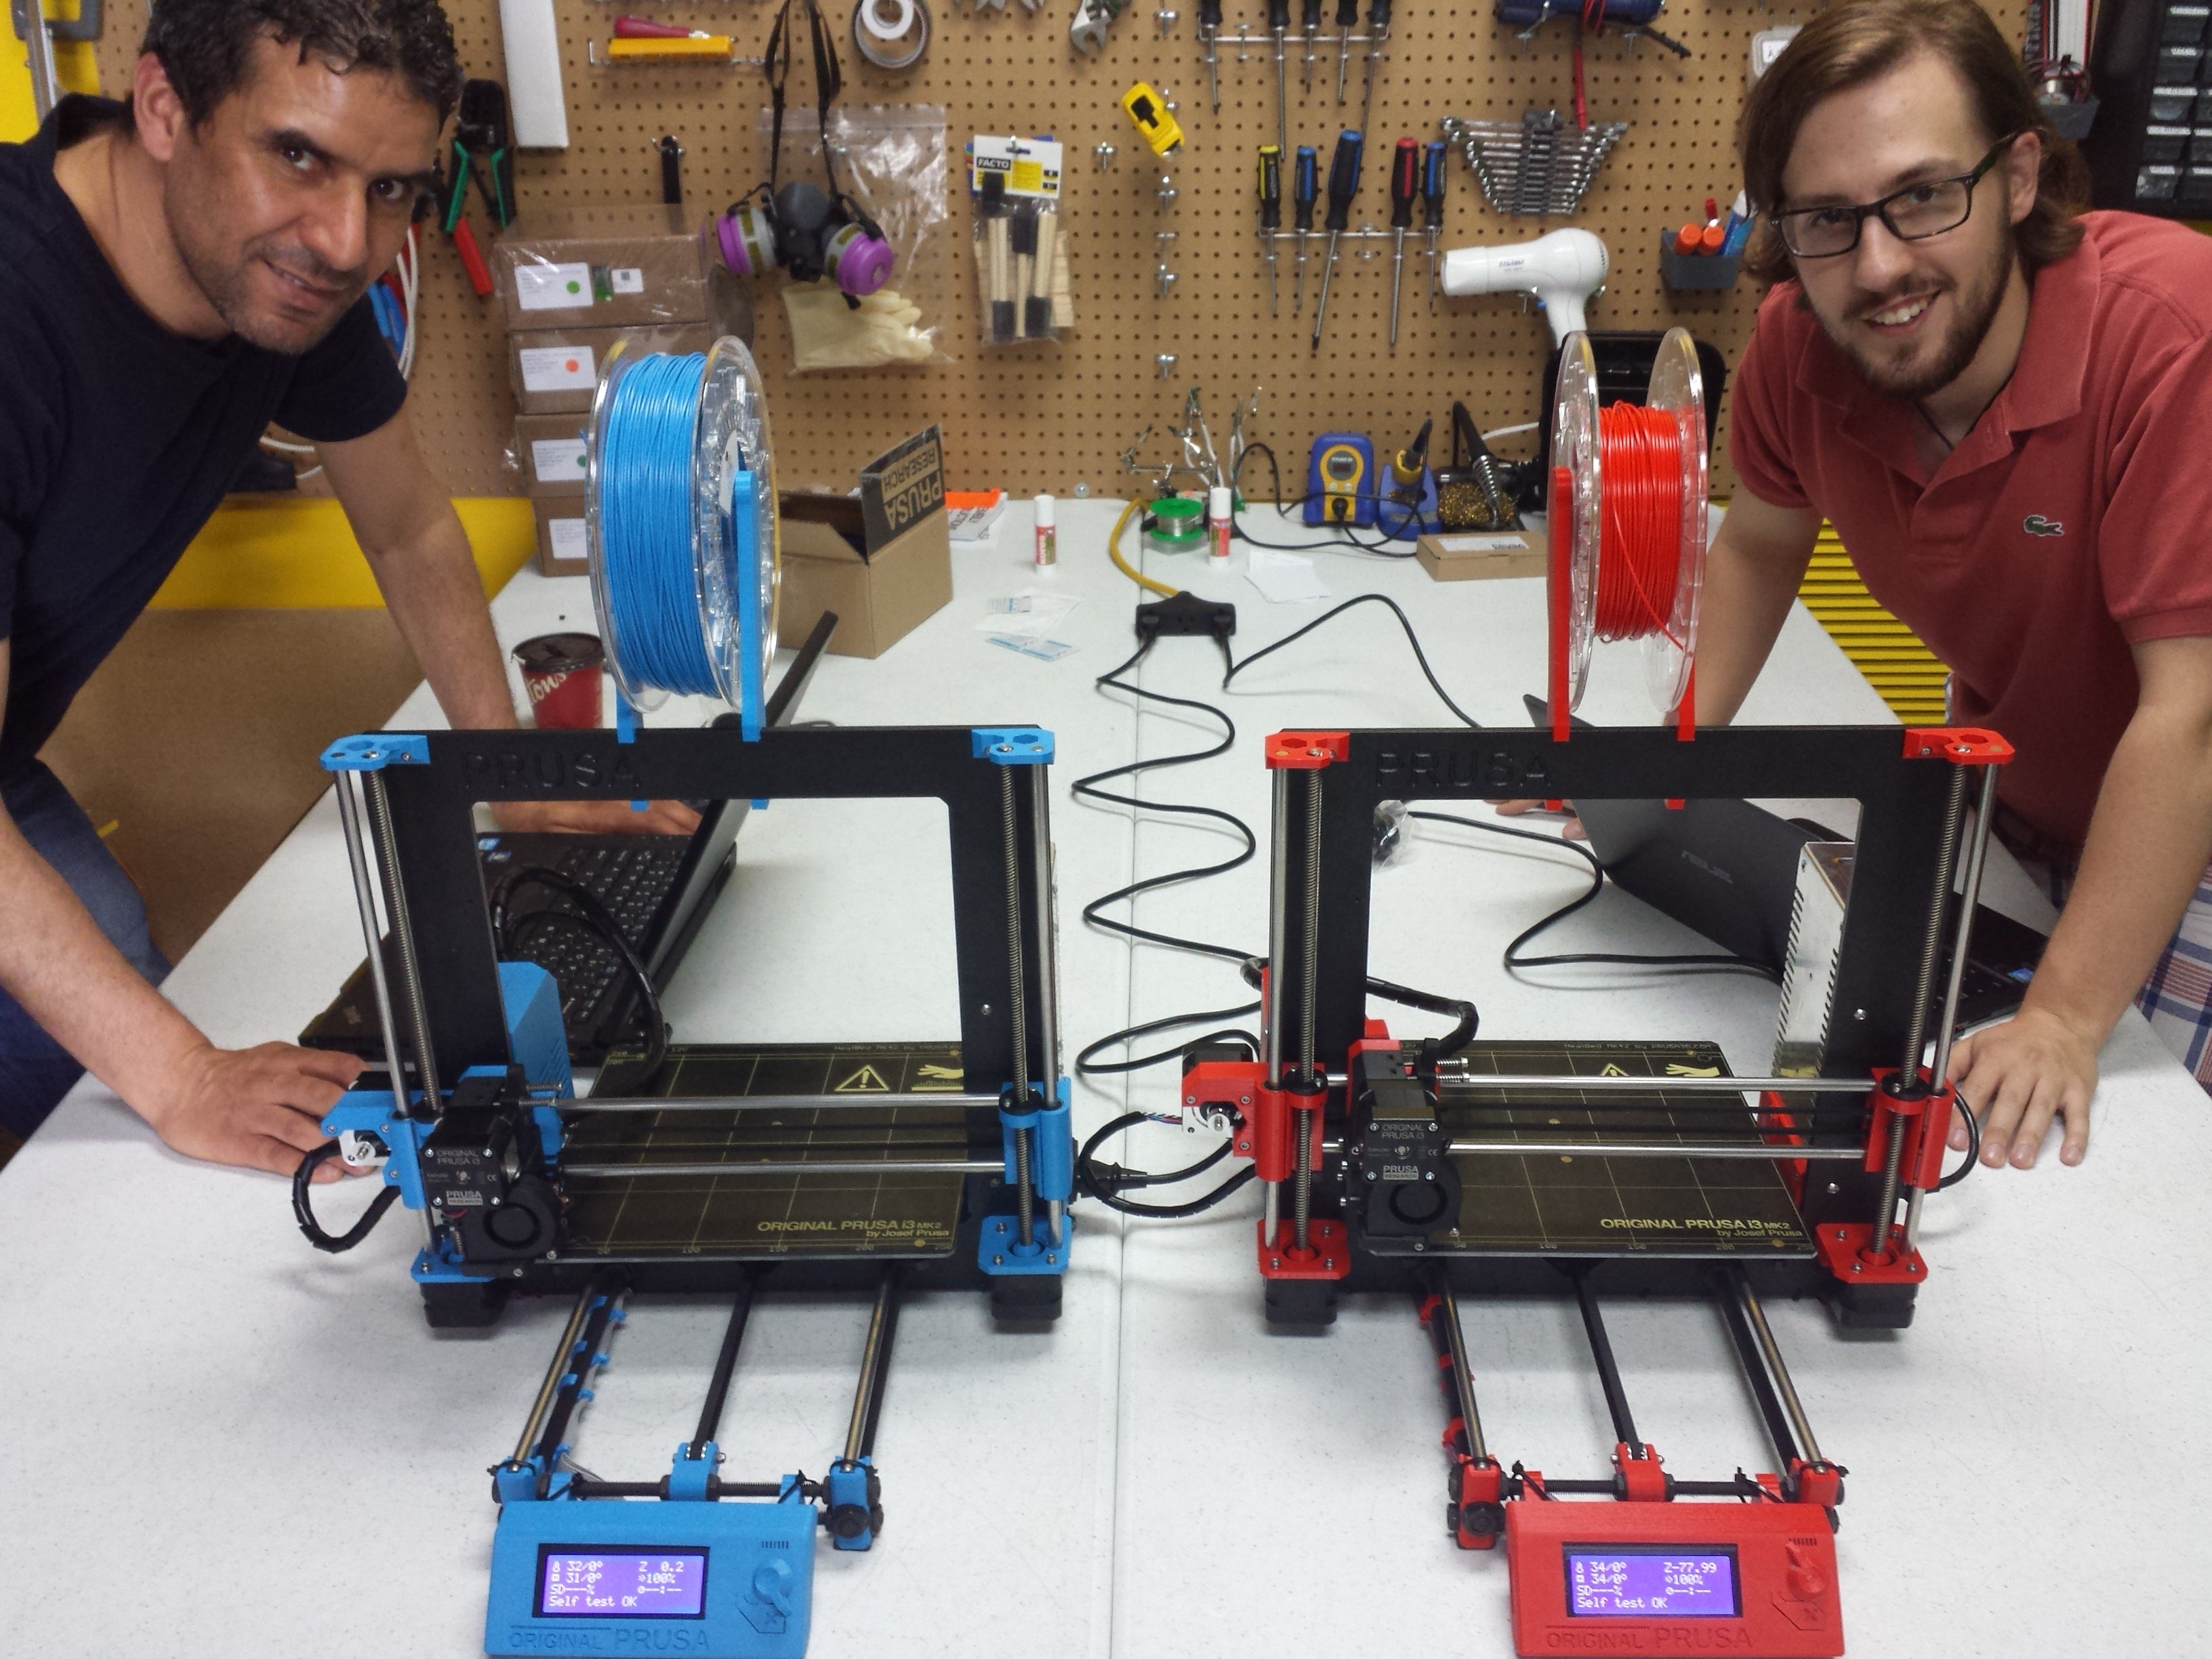


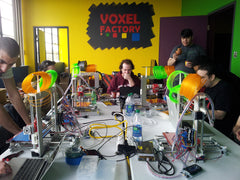
 François Chagnon from FouLab and François Lahey from Voxel Factory are very proud to offer the first ever RepRap 3D printer workshop in Canada! Build your own "Prusa Mendel I2" 3D printer in a 2 days workshop and learn how to calibrate, operate, maintain and get the best possible results with it. This is a unique chance to get a RepRap up & running lightning fast! Save hundreds of hours searching blogs and forums to setup your printer. François Chagnon, your teacher for the workshop, has already built many different RepRap and modified some of them.]]>